Showing posts with label college. Show all posts

Thursday, August 14, 2014

How to be Vegan and a Little Less Poor: Part 1

Hi again everyone! I know I keep saying how I'm going to post way more regularly and have tons of interesting things to tell you, but I keep getting really busy and not having a lot to say. I'm sorry. But guess what? Today I have something really awesome that I want to share with all you lovely people out there. (Before anyone asks, I'm not getting paid to promote this stuff either. They're legitimately my own personal recommendations.)

One of the biggest concerns that people frequently tell me, and one of the main reasons people hesitate to go vegan is that sometimes vegan food can just be downright expensive. (Now, I know there are tons of cheap recipes in the Vegan College Cookbook, but sometimes, it's still a tad expensive.) But even if the money isn't a problem for you, it never hurts to have more of it right? So, I'm going to give you 5 tips and recommendations for how you can get the vegan products that you want, and have a bit more money when you're done.

My first tip is perhaps a bit obvious, but always check for coupons! Alternative milk products always have coupons out. Brands like Silk, So Delicious, and others have lots of coupons available all the time. Normally. you can find them just by doing a quick search on the internet. Other times, grocery stores print out coupons with your receipts, so hang on to those. I frequently get coupons for veggie burgers that way, because they give you coupons based on what you already buy. The best part is, frequently, you can stack coupons with other deals and savings, especially if it's a manufacturer's coupon. If you've gone to the store, and forgotten to check for coupons, you can normally pull the coupons up on some sort of mobile device, so you can access them really easily.

My next tip is use the Ibotta app.


When I first heard about this app, I thought it sounded a bit too good to be true, but it's completely legit. Ibotta has cash rebates for specific products and stores. I primarily use it for groceries, though, they have rebates for lots of other categories like clothes, beauty products, pet supplies, restaurants, electronics, etc. Many of those categories have rebates for a certain amount back when you spend another certain amount, which is great if you were going to shop there anyway. But anyway, back to groceries. Ibotta has a lot of different products that can be purchased from a lot of different stores. They have rebates for stores like Walmart, Costco, Bi-lo, Walgreens, Whole Foods, and more. They products they offer rebates for changes, but they often have rebates for So Delicious, Enjoy Life, Peace Cereal, and several other vegan-friendly brands. Sometimes they also have rebates for fruits and veggies, and the brand doesn't matter. One nice thing is that you are earning the rebates on top of whatever sales or coupons you use to buy the products, which means you can get a phenomenal value for these products. Also, as the app advertises, you are rewarded with cash, not just with more coupons. You can send your rebates basically straight to your bank account, which is super-convenient. And, it's really easy to rack up a lot of cash from rebates. Honestly though, one of the most amazing things about this app, is that it lets you benefit from teamwork. Sure, you can be saving money all by yourself. But, they have things like teamwork bonuses as well. Your team is made up of any people you refer or are referred by and / or any people you know connected social media who also use the app. In any given month, when you and anyone in your team redeem any rebates, it goes toward the teamwork bonus. There are multiple levels of the bonus, but basically, when you and your friends are earning money, you earn even more money. (Of course, these can be completed by yourself, but it's easier to complete them with friends.) If you're new to Ibotta, and would like to be in my team, use the referral code "arbiza" when you sign up, or send me a message using the Contact Form on my blog, and be sure to include your email and a note saying you're interested in an invite to this app. You'll probably get a ton of money just from all the rebates I've redeemed, just FYI. Obviously, not all the products they offer rebates for are vegan, but you don't have to buy them. So, it's okay. Ibotta has a minimum cashout of $5, but that's really easy to earn.

Tip # 3 is use the Checkout 51 app.


This app is similar to Ibotta, but not exactly the same. For starters, it's really only for groceries. It's a little bit easier to use, and it doesn't matter what store you buy the products at. However, there aren't any kind of team bonuses on Checkout 51, and there aren't quite as many different rebates available. But, Checkout 51 frequently has a lot of rebates for fresh veggies and fruits, and a lot of their other rebates aren't brand-specific. That means that when they have a rebate for bread, you could get gluten-free, vegan bread, and they'd still give you the rebate. Checkout 51 also has some rebates for vegan brands though, like Earth Balance. Checkout 51 has a minimum cashout of $20, which might take you a little bit longer, but it certainly isn't hard to get. Checkout 51 also has a weekly drawing for $500 that you qualify for if you spend at least $60 on any single shopping trip during the week. (Trust me, $60 sounds like a lot, but it's way too easy to do.) Sometimes the rebates on Checkout 51 overlap with Ibotta, which means you get rewarded twice! Twice is nice.

Another tip is to use the Receipt Hog app.



This app rewards you for groceries (and also convenience store trips,) but unlike Checkout 51 and Ibotta, it doesn't even matter what you buy! Any groceries from anywhere earn you coins on Receipt Hog. The more money you spent on a trip, the more coins you earn, but you get rewards no matter how much you spent. You can also get spins on the Receipt Hog "slot machine" for every receipt you upload after uploading at least one receipt per week for 5 weeks straight. You won't always get a reward for this, but you have the opportunity to earn a few extra coins. You can redeem coins either for a $5 check in the mail, or a $5 Amazon gift card. It takes a little bit more time to earn the rewards on this app, but you can get rewards for whatever you want from whatever store basically. On top of all that, you can use this app to get rewards in combination with the other apps for sure, because it doesn't matter what you bought, or where. If you'd like an invite to this app, send me a message using my Contact Form, and let me know you are interested in an invite to this app.

My last tip for today is use the Punchcard app.


Punchcard is one of many apps that allows you to earn mPOINTS. Your mPOINTs can be redeemed for a variety of products and giftcards, though the absolute best value is the $1 Amazon giftcard, FYI. (Other apps include a fitness tracking app called Nexercise, a super-fun, How To Train Your Dragon game called Dragons: Rise of Berk,  and for iPhone users, you can also earn mPOINTS with the MyPlate app by Livestrong.) Punchcard rewards you for uploading pictures of your receipts from grocery stores, restaurants, gas stations, and actually just about anywhere. (I'm including this app though because you can get rewarded for grocery receipts.) Again, you can use the same receipts to earn rewards on this app as you could on all the others. (Plus some.) When you upload a picture, you get a chance to spin their little "wheel of fortune" which will give you a certain amount of mPOINTS. You can earn bonus mPOINTS by sharing to a social media website. (You can always immediately delete the post.) When you go to claim your mPOINTS, you are frequently given even more bonus opportunities, like taking quick surveys, watching short videos, viewing some other sort of ad, or downloading and launching a promoted app, (which you can always immediately uninstall.) It's really easy to earn enough mPOINTS for a $1 amazon card especially if you use multiple apps that earn mPOINTS (Have I mentioned that the How To Train Your Dragon app is super-fun?), though you can only get 1 of any given reward per week. This app is a little bit less exciting than the others because you can't just get cash from it, but like I said, if you are getting those $1 Amazon giftcards every week, they add up. If you're a poor college student like me, that means slightly cheaper textbooks, (which turn into real money when you re-sell them at the end of the class.) Or you can also, you know, buy just about anything on amazon, like new gadgets or clothes, all of which are important.

Alright everyone. Thanks for reading, everyone! I know this was a bit of a longer post, and I know I recommended a lot of apps. But seriously, they don't take that much time, and they can help save you lots of money on products you'd be buying anyway. I really hope you found these tips helpful. If you know of any other apps that help you save money on groceries or other vegan / cruelty-free products, PLEASE let me know in the comments. I will love you forever!

Wednesday, May 28, 2014

Runway Wednesday: Improving the Duct Tape Mannequin / Dress Form

Alright, so some of you might be wondering: This girl is a fashion major at university. Surely she has access to REAL mannequins. Why would she want a form made of duct tape? Isn't that a little bit amateur? (Now, some of you probably had no idea I am a fashion major, or you just weren't wondering. Just hold on.)

For those of you who WERE wondering, I do have access to regular dress forms at school. So why am I interested in duct tape dress forms? Well, first off, I don't like having to go in to school to use the mannequins, since I'm a town student, and they right size form is hardly ever available. Also, the sewing lab at my school has really stupid hours.

 Second though, I actually PREFER duct tape forms for couture garments. Why? I'm glad you asked! While the mannequins at my school have moveable shoulders, which is really nice for putting clothes on them, they are very standard-shaped. That's cool for ready-to-wear clothing. But for custom clothing, things get difficult. 

Let me explain. My favorite design method, especially for custom designs, is draping. (As opposed to flat patterning.) For those of you know don't really know what that means, it means that I use magic to throw fabric at a mannequin and turn it into a piece. Actually, It just means that the garment is shaped directly on a mannequin without a pattern. Duct tape mannequins are just as customized as the model or customer, because you're basically using duct tape to cast their exact shape. So, you know the garment will fit them. Additionally, regular forms tend to have very shallow layers of stuffing before you get to a hard shell. This makes it difficult to stick pins directly into the form. Duct tape forms are stuffed without a hard shell, so you can push pins right in, very easily. This is really convenient for draping, since you need the pieces to stay in place while you're shaping the garment. Personally, my dress forms look like giant voodoo dolls while I'm constructing clothes. I need those pins to stay there. Another big advantage of duct tape forms is they display those custom garments better, due to the custom fit. Displaying a couture garment on duct tape? Isn't that a little trashy? I don't think so. There are plenty of decorative tapes if you want to make things look nice. You can also sew fabric covers for the dress form, or you can decoupage decorative (or minimalist) paper over the duct tape to make it look professional.

So, why do YOU need a duct tape mannequin / dress form? Well, maybe you don't. But if you're into DIY projects, they frequently require pinching / folding / pinning / cutting fabric on yourself, and it's a whole lot easier if you have a body double. If you make a lot of your own clothes, it's nice to have a custom fit, and it's nice to be able to display projects you're not currently wearing. Even if you don't make your own clothes, they make good decorations! You get to feel really fancy if you display your favorite ensembles on a mannequin, and all your friends will be jealous. Or, you can display things you don't get to wear frequently, such as prom dresses, wedding dresses, bride's maid dresses, costume / cosplay outfits, or any other ensembles that you obviously wouldn't wear every day, instead of putting them in storage or hiding them in the back of your closet.

Well, now that we've covered that, let's move on to the real purpose of this post. I'm not going to actually tell you HOW to make one of these things. How rude. Why not? Because there are TONS of tutorials on the internet. I don't need to just be a repeat. This post is all about how I'm making these dress forms BETTER. The basics are the same. I have 5 tips for you to make sure that you have the best duct tape dress form that you can!

Tip #1: Wear a giant trash bag under the tape. Some tutorials will tell you to wear a t-shirt that you don't like under the tape. You cut through the shirt and it is destroyed and lost when you remove the form from yourself. I don't care if you don't like the shirt. That's a waste. There are much cooler things you can do with shirts. Especially shirts that you don't like. That's why I suggest wearing a cheap trash bag under the tape. The best length for dress forms / mannequins that aren't a whole body is to cut off approximately where the fingertips reach on the thighs and go up part of the way up the neck, and out to the edge of the shoulders. Because whatever you're wearing under the tape will shift as you put the tape on, you might end up needing two bags, or perhaps one trash bag with a grocery bag taped to the bottom. But if you use shirts, this will ruin two shirts potentially, and that's just sad. And let me tell you, you do have to wear something under the tape. I don't even want to think how painful it would be to get the form off without a barrier in between the tape and your body. Oh, and girls, wear a bra under the bag and the tape. Just be really careful when you cut the form off. That way whatever garments will fit you with a bra on, whether it's built in or separate. I guess if you'd rather not, that's your business. 

Tip #2: WRAP THE TAPE COMFORTABLY! People. This is HUGELY important. The first time I made a duct tape form, I wrapped it really tightly because I thought that all the layers of tape would build up and make all my pieces too big. Guess what? They didn't. What ended up happening is my clothes were too tight and I had to let everything out. Not cool. Another reason to put the tape on comfortably is you'll squish your body into the wrong shape. My first form was really lopsided, lumpy, and weird-looking. Tragic. This is especially important if you're a girl, which is probably the majority of you (or at least your models and customers.) Remember what I said about wrapping too tightly changing the shape? You want your chest to be the right shape. If you wrap too tightly, you'll lose the definition of the chest and end up with an awkward uniboob look, and nothing you make will fit. This is just a NO. In order to make sure you have that shape right, you must use pre-cut pieces of tape. It also might be helpful to carefully cut the pieces down the length of the tape, that way you can be more precise. This technique is also helpful if you're wanting to make a mannequin with separate legs instead of a true dress dorm. 

Tip #3: Don't skimp on the tape. My first dress form was only 2 layers thick, which meant it didn't keep it's shape well. I've had a lot more success with 4-5 layers. I wrap 3 layers while it's on the model, and then seal up the holes, and add another layer over the whole thing. A bonus tip about the top layer: wrap it the cross direction of your other layers. (Up and down instead of side to side.) This adds strength to the dress form. If you wrap all the layers in the same direction, gravity will pull your mannequin apart. Here's a work-in-progress example of wrapping cross grain:


(The tragic dress form with the red tape did not have cross-grain tape, and kept pulling apart. That's why there's red tape. I had run out of the silver tape, and I kept having to repair it with the red.) Another reason to add a layer over the top after the dress form is sealed up is because sometimes after you've stuffed it, you find spots that didn't get enough stuffing. For me, this is almost always the neck and chest. I frequently have to cut it open again, and add more stuffing to those places. I tape it back up when I'm done, but the final layer helps make sure that won't pop open. Wrap a cross-grain layer even if you're going to decoupage over it all. There is no such thing as too strong when it comes to these things.

Tip #4: Don't spend a ton of money on fancy stuffing. You have to pack the stuffing in really tightly, so you almost always end up needing more than you expected. Some tutorials will tell you to stuff your form with Fiber Fill. Well, you'll need a TON of that stuff, and it's not always very cheap. Others will tell you to use wadded newspaper, but that's not always very effective. An easy filling is destroyed hosiery. My mom had a ton of stretched out and torn pantyhose and tights around the house, and she was perfectly happy to let me get rid of them for her. I also use fabric scraps that are too small or ugly to do anything with. A great place to find these is around a serger if you have one. Yarn, string, and thread scraps are also good. If that's not enough to fill up your form, my go to stuffing is paper from the shredder. If you don't have enough paper shreds, go through your junk mail stack. I'm sure you'll have plenty of shreds in no time. With so many options for filling, there's no reason to spend money on it unnecessarily. Admittedly, sometimes I have to use some fiber fill when adding stuffing to the neck and chest, but if you don't want to do that, save your fabric and string scraps for that. It's just really hard to get paper shreds in re-opened holes. 

Tip #5: Put something solid in the neck to help it keep the right shape. I didn't think about this when I made my first duct tape dress form, Marie Antoinette, and she had a tragic, untimely ending. See:


This is just sad. Duct tape is pretty strong, but it's not THAT strong. What I suggest to put in the neck is a peanut butter jar lid. It's about the right shape as it is, but if it's not quite big enough, you can always use another kind of lid, or you could wrap a bit of duct tape around the outside of the lid until it's wide enough. Here's a dress form I made with a lid in the neck:


Isn't that so much better?

It's also helpful to put something sturdy inside the shoulders, waist, and hips. I suggest hangers. If you don't want to waste your good hangers, there are plenty of stores that give you the hangers that come on the clothes. (Kohl's is one I can think of off the top of my head.) You can also use broken ones, like if the hook is broken off. Regular hangers are good for the shoulders and hips, and small skirt/pants hangers are good for the waist. If you can't find one small enough, you can just break a cheap hanger down to the right size. If you don't put these in to stabilize the form, the shoulders might droop, and the waist and hips will round out. What I mean by that is, they'll squish in at the sides, and out at the font and back. You don't want a sausage dress form. 

I really hope this was helpful for you! If you would like to share any additional tips, or tell me whether these worked for you, I'd really love to hear it. Leave me comments! If you thought these tips were useful, share the love! Share this post with your friends! I really do love hearing your feedback! It's nice to hear that what I'm doing is worth my time! Now go out there and create something amazing!

Sunday, February 2, 2014

CTTVCC: Ants on a Blog


This delicious snack is one I've enjoyed since childhood. Eating this again brings back memories of my nana making these for me when I was knee high to a grasshopper. (Pardon the funny expression. I don't really ever use it but it makes me laugh because it makes me think of cute little old ladies in the South.) My nana always cut the celery smaller so that it was more kid-friendly. I used to get these when coming home from dance lessons. Ah. . . Memories.

The recipe calls for:

  • 2 stalks celery, cut into sticks
  • 1 box raisins
  • 4 tablespoons peanut butter
Here's what mine looked like:


The only thing I changed about this recipe was using dried cranberries instead of dried grapes. I mean, I did also use the sugar-free kind, just to be a little healthier, but whatever. For those who may have peanut allergies, or just want to try mixing this up a bit, you could use crunchy peanut butter instead of smooth, or any kind of nut or seed butter that you wanted. My favorite non-peanut butter is sunflower seed butter. Let me tell you, it is amazing. (I have also heard good things about pumpkin seed butter, but I haven't had the opportunity to try it yet. I might end up having to make some myself next fall after carving jack-o-lanterns.) Anyway, this is a super-simple, super-satisfying recipe that's great for snacking on without getting your hands that messy. Enjoy!

Saturday, January 18, 2014

Expanding Beyond Animal Experimentation

Alright. So, as an introduction, today I will be posting a digital version of a research paper I wrote for my English 102 class last semester. I may or may not re-post it in like, a year. Reason being, this paper was turned in and revised several times, and the final time it is turned in, the teachers do not give it back for a year for some legal reasons. It didn't make sense to me, but whatever. So basically, I can't check to see what updates and revisions my teacher suggested for a while, so I might revise it when I do get the paper back. Of course, I wrote my paper about animal testing, and so I've been dying to share it with the people who care heavily about animal rights. I didn't feel like waiting that long to share it. You may remember that about 2 years ago, when I was first starting this blog, I wrote a research paper showing all the benefits of going vegan. This is a similar format to that, only it's a different side of the animal rights movement. I was honestly surprised how little my friends and classmates, even teachers knew about animal testing. I don't remember ever being that in the dark about the topic. It really opened my eyes as to how much people still have to hear about this to realize it's a big deal. I am fine with people referencing this paper, sharing it, etc. as long as I am attributed for it. Thank you.


Expanding Beyond Animal Experimentation

by

Kerry Marley

December 12, 2013 


Humanity has a long history of experimentation on animals, especially in the medical and cosmetic professions. Many people argue that humanity would not be where it is today if it were not for its reliance on animal experimentation. It is nigh unto impossible to deny that animal testing has ever been useful, although the argument could certainly be made that such a method was not always necessary. However, with advancements in medical and scientific technology, animal testing is no longer a morally defensible practice.
First, animal experimentation is an abusive method. Insufficient regulation about procedures that can be done to animals allows for abusive experiments. Abuse can be defined as excessive cruelty (willfully subjecting others to pain and suffering) or habitual violence. Abuse is allowed in research because “the only U.S. law that governs the use of animals in laboratories—the Animal Welfare Act—allows animals to be burned, shocked, poisoned, isolated, starved, forcibly restrained, addicted to drugs, and brain-damaged” (“Animal Testing is Bad Science” [1]). These methods are undeniably abusive and cruel, because the suffering is intentional. In Practical Ethics, Peter Singer, an Australian philosopher and professor on the ethics faculties of both Princeton University and University of Melbourne, alludes to British philosopher Jeremy Bentham who famously proposed that “‘the question is not, Can they reason? nor Can they talk? but Can they suffer?’” (57). Singer follows up on this question by stating that “defenders of experiments on animals do not deny that animals suffer. They cannot deny the animals’ suffering because they need to stress the similarities between humans and other animals in order to claim that their experiments may have some relevance for human purposes” (Singer, Animal Liberation 40). Singer also points out that United States military “experiments were designed so that many animals would suffer and die without any certainty that this suffering and death would save a single human life, or benefit humans in any way at all” (29). The fact that these experiments would have no benefit to humans certainly qualifies them as excessive, therefore abusive. Possibly the ultimate example of the cruelty of animal experimentation methods is that of the decompression chamber. As Singer notes, decompression chambers were researched in Nazi Germany on other humans. Sadly, later, the experiments were repeated in England on pigs. “All suffered decompression sickness, and some died from these attacks’” (Animal Liberation 83-84). This research was abusive because it caused excessive suffering. When the research has already been documented, even unethically, there is absolutely no excuse to repeat it for curiosity’s sake. As the saying goes, two wrongs do not make a right.
Insufficient regulation about treatment of animals in testing allows for abusive handling. According to Matt Rossell, who formerly worked for Eliot Spindel, a medical researcher in the field of the effects of consumption of nicotine, pregnant monkeys were “subjected to multiple surgeries to implant nicotine pumps in their backs. . . and their babies are cut out of their wombs. . . to dissect their lungs (“Help End,” [1]). If that isn’t bad enough, Rossell continued by saying that he “‘witnessed some of the mothers post-surgery with the same signs of clinical depression that women suffer from after going through the emotional tragedy of losing a stillborn baby’" (“Help End,” [1]).  Again, willingly forcing distress and pain on another being who is capable of feeling pain is cruel. The experiments were not even intended to study maternal depression, so forcing the animal mothers to experience excessive suffering is abusive. Spindel’s experiments are just one example of cruel treatment of animals in testing. Even more generally, “no experiment, no matter how painful or trivial, is prohibited [by the US government] – and pain-killers [sic] are not even required (“Animal Testing is Bad Science” [1]). Santa Clara University published an article which states that annually “An estimated eight million [animals] are used in painful experiments. Reports show that at least ten percent of these animals do not receive painkillers” (Andre, Velasquez [2]). Ten percent of eight million is a minimum of eight hundred-thousand animals who are not given painkillers during painful experiments, which is an excessive number.
Second, animal experimentation is an ineffective method. Animal tests are inaccurate because of differences between animals and humans. According to In Defense of Animals, an organization that seeks to protect animal welfare, “in the case of nicotine's effect on infants born to smoking mothers, it is clear that such information could be mined from human clinical studies—and would have direct relevance to humans” (“Help End” [2]). Animal testing was harmful to humans by failing to discourage the active harming of unborn children. The animal tests gave mothers a false sense of security and a wrong belief that their habits were not harmful to their babies, when in fact, the truth is exactly opposite. In fact, “Animal data is so unreliable, that for decades, the tobacco industry used it to ‘prove’ that nicotine is not harmful. It was only through human studies that the link between tobacco consumption and cancer, heart disease, and other pulmonary illnesses was proved” (“Help End” [2]). The use of animal testing in this regard was unhelpful to humans because it failed to show the link between nicotine consumption and disease, thus failing to accurately warn people of potential health dangers. Sadly, these examples are not the only instance of failure of the results of animal tests to accurately translate for human biology. In fact, “The Food & Drug Administration tells us that 92% of drugs tested safe and effective in animals fail in human trials” says John J. Pippin, M.D., who is on the Physicians Committee for Responsible Medicine. He continues with the example of Vioxx, a medicine developed for treating arthritis which “killed more Americans than died in the Vietnam War, yet it was deemed safe in eight studies using six animal species. Many drugs have had severe and even lethal effects in people after demonstrating safety in animal tests” ([1]). This lack of direct correlation is not news. According to Peter Singer, it is common knowledge “that extrapolation from one species to another is a highly risky venture. . . . As well as exposing people to harm, testing on animals may lead us to miss out on valuable products that are dangerous to animals, but not to human beings.” Singer continues to mention the examples of insulin, morphine, and penicillin (Animal Liberation 57). Pippin adds aspirin and acetaminophen to the list ([1]). In this lose-lose situation, animal experimentation is an inaccurate predictor of the effectiveness of medications. The evidence seems to suggest that any benefit from animal experimentation in this regard is marginal at best.
Animal tests are inaccurate because the testing environment skews the results. An essential part of conducting a viable experiment is to allow for only one variable. However, the testing environment is in and of itself a variable not accounted for. According to the New England Anti-Vivisection Society, “stress, routinely experienced by animals in labs, negatively influences the reliability of animal research data. Stress influences heart rate, pulse, blood pressure, muscular activity, and hormone levels and can modify the normal values of these variables significantly” (“Limitations” [1]). The research environment is therefore interfering with the animals’ normal body functions. If normality cannot be established, then a change from the normal state cannot be quantified either. Stress is not the only affected factor. “In one study, researchers discovered that not only is stress a common factor for mice in labs—just having a researcher present can alter a mouse’s behavior—but they also experience ‘sympathy pains’ for the mice surrounding them. ‘In other words, seeing another mouse in distress elevates the amount of distress the onlooker displays’” (“Limitations” [1]). The research environment makes the mice actively behave differently than they would whether they are by themselves or with other mice.  
Finally, animal experimentation is an outdated method. Much of the developed world has deemed animal testing unnecessary. For example, “a complete ban on the sale of cosmetics developed through animal testing has taken effect in the European Union. The ban applies to all new cosmetics and their ingredients sold in the EU, regardless of where in the world testing on animals was carried out. The 27 EU countries have had a ban on such tests in place since 2009. But the EU Commission is now asking the EU's trading partners to do the same” (“EU Bans” [1]). Essentially, the vast majority of Europeans deemed animal testing unnecessary and undesirable. As of yet, the ban enacted in 2009 has not hindered the continual development of Europe, and European women can still wear safe, good-quality makeup if they so choose. Transitioning from the cosmetic industry to the medical industry, “Australia, Japan, and the E.U. have already banned or limited experiments on great apes in medical research” (Biba 14). Additionally, because other methods have been deemed better, “the National Institutes of Health announced that it is phasing out experiments on chimpanzees” (Biba 14). These changes, presently limited to great apes, seem to point in the direction that the medical field will go.
Many viable alternatives to animal testing exist. Much of the world is abandoning the use of animal experimentation, but the discontinued use of this method of research and testing will not leave the medical and scientific realm without ways to discover new data or verify data and safety of products. “Effective, affordable, and humane research methods include sophisticated in vitro, genomic, and computer-modeling techniques as well as studies of human populations, volunteers, and patients“ (“Alternatives” [1]). According to Popular Science article “From Chimp to Chip,” by Erin Biba, institutions have created, or are developing, tissue and organ models on chips that effectively model human reactions (14). Additionally, alternative methods of research tend to be cheaper than animal experimentation because they don’t require purchasing, housing, feeding, and maintaining living creatures. The existence of these methods makes any need for animal testing obsolete.
As Bishop Desmond Tutu once famously said, "There's nothing more difficult than waking someone who is only pretending to be asleep." Although the world is still only beginning to realize the moral indefensibility of animal testing, some simply do not want to know. As has been evidenced, ignorance is certainly not bliss, especially for the animals being researched on. There is however, a brighter, more ethical future in sight for research and discovery. Because animal experimentation is clearly unnecessary, it is no longer morally justified.

Works Cited

Andre, Claire and Manuel Velasquez. “Of Cures and Creatures Great and Small.” Issues in Ethics. V. 1, N. 3 (1988) Web. 10 Nov. 2013.

“Alternatives to Animal Testing.” PETA. Web. 10 Nov. 2013.

“Animal Testing Is Bad Science: Point/Counterpoint.” PETA. Web. 10 Nov. 2013.

Biba, Erin. “From Chimp to Chip.” Popular Science Dec. 2013: 14, Print.

“EU Bans Sale of All Animal-tested Cosmetics.” BBC News. 11 March 2013. Web. 10 Nov. 2013.

“Help End Nicotine Experiments on Monkeys at OHSU.” Vivisectioninfo.org. Web. 10 Nov. 2013.

“Limitations and Dangers.” NEAVS. Web. 10 Nov. 2013.

Pippin, John. “Put Animal Testing to Sleep: Pro: Misleading Conclusions, Wasted Money.” Bloomberg Business Week. Web. 10 Nov. 2013.

Singer, Peter. Animal Liberation. 1975. New York: HarperCollins, 2009. Print.

---. Practical Ethics. 2nd ed. New York: Cambridge UP. 1993. Print.


Wednesday, January 1, 2014

New Year's Resolutions and Contest

So everyone, there aren't necessarily a ton of things that I've resolved to do this year. I don't want to just have an ever-growing list of things that I'll never do just because I've resolved to do them. I don't really have any health resolutions. I mean, I'm already vegan. What else is there? I guess I could theoretically resolve to stop cheating my gluten-free diet, but I don't really have an ethical problem with gluten, and they make magic pills that can help you digest gluten occasionally.

I have resolved to post more on this blog, especially Vegan College Cookbook reviews, which I guess could be food-related, and thus health-related, but that's really a stretch. But I got a seriously nicer camera for Christmas, so the photo quality on this blog should be improving! YAY! I have also resolved to be more active for the causes and charities I care about, especially animal welfare. But I guess because everyone needs one resolution that they don't mind not keeping, I also resolve to keep my room cleaner. Ha ha ha! Oh, that's a good one. So, that's not an exhaustive list of my resolutions, but too many of them would require context explanations that it's not worth bothering to mention them.

I hope you've made some resolutions that you plan on keeping. Though, as a tip, make them realistic. For example, I would not resolve to be the #1 Pop star in America by the end of the year. First of all, pop isn't even my favorite genre. Like, at all. But that's beside the point. However, I also wouldn't make them so boring or non-specific that they're not motivational, such as resolving to be "a better person" or resolving to smell more flowers. Unless of course, that's your thing. And then, by all means, smell away. I hope you're not allergic to pollen. Basically, make sure it's something that can be accomplished to your satisfaction. If you're really not sure what you want to resolve, but you want to resolve SOMETHING, here's a list of suggestions:
  • Plant a new tree or shrub by the end of the year.
    • You can buy a tree already sprouted (as long as you have permission from the powers that be,) or if you're up for a bigger challenge, try starting out all the way from a seed. Avocados are a good choice if you aren't sure what to go with. First of all, you can make yourself some yummy guacamole to get the pit to start out with. Second, the plants themselves are very pretty.
  •  Plant a veggie garden.
    • The best part about planting your own garden is picking what veggies you want to grow. Then you get really inexpensive, fresh food once it's grown. If you don't really have a yard to plant a garden in, like if you live in a dorm or apartment, or maybe your parents don't want you to dig up their nicely manicured lawn, you can plant window-box gardens, or potted plants. Those are great for smaller plants or herbs. I'd recommend rosemary and basil if you're not sure what to go with, but you want something small.
  • Complete 5 Actions per month at Peta2.
    • This one is really easy because the people over at PETA have already dome the hard work for you by making posters, collecting email addresses and researching the details, etc. Plus, you earn points by doing all those things and you can get yourself free stuff with the points. Who doesn't love free stuff?
  • Go Cruelty-Free!
    • Maybe you already only EAT vegan, but you haven't made the switch with cosmetics, clothes, etc. There are so many great brands of cruelty-free products, and many of them are really affordable. 
  • Go Vegan!
    • If you haven't already done this one, it really has never been easier. There are so many recipes out there thanks to the internet, and veganizing existing recipes is also super-simple with the amazing options that are out there.
  • Go Vegetarian!
    • If for some reason, you can't go vegan yet, or would prefer to make the switch more gradually, this is a good baby step. Again, it's never been easier!  
  • Go Organic!
    • This one can be a bit pricey. But it's certainly more healthful than eating junk food. Though I guess they do make organic "junk" food. Eh. Whatever. Aldis and Costco have a surprising amount of organic options, which are inexpensive.
  • Convince your Family / Friends to do Meatless Mondays.
    • Maybe they won't go 100% vegan or even vegetarian. But there are a lot of doctors and specialists saying that giving up meat at least 1 day a week has a ton of health benefits. This might mean that you have to cook diner once a week, but I'm sure you've got some ideas that you're dying to try, right?
  • Try one new vegan recipe per month.
    • This could involve a bit of pre-planning, but trying new things can be a lot of fun, and if you have the Vegan College Cookbook, it can be really affordable too. 
  • Stay Positive / Be Thankful.
    • The holidays are coming to a close, and it's easy to get out of the habit of being thankful for small things in life, and to take the things you have for granted. One thing that I have found helpful is to get a notebook or journal and write down things that I'm thankful for / happy about. For example, a friend of mine recently had been struggling with depression, and I encouraged him to write down 5 things a day to be thankful for. You can write more or less things, and do it as frequently as you'd like. If 5 things a day is too much, you could do 3 things a day, or 5 things twice a week. The important thing is not to quit when you forget a day. Even if you forget a week. If you're ever feeling down or discouraged, read back through the things you've written, and you're likely to feel a lot better. Everyone I've ever gotten to do this has found it extremely helpful.
If you have any other good ideas for general resolutions you'd like to share, please leave a comment! I'd love to hear what you have to say.

So, whatever you've resolved, here is a motivational picture.


This is my cat, C3PO, who I adopted from my local animal shelter. He had already had one leg amputated when I found him, but he gets along without it pretty well, even if he looks kind of ridiculous when he runs. Anyway, the other day, he climbed on top of our giant old TV that was given away, and was acting like he had achieved the most amazing accomplishment possible. It was pretty much adoreable. This was just an excuse to post a picture of my cat.

Alright. So here's the contest part:

First, you must follow this blog by at least one method if you do not already. Next, using the contact form located in the right sidebar, send me your name and email address, and at least 1 activism-related resolution. The winner will be randomly selected by computer, but if your resolution is just "I resolve to be more active" or something like that, then you won't qualify. And trust me. You want to win. Why? Because here's what the winner gets (approximately $25 value):
  •  2 stickers from Sevenly, a company which funds a huge variety of humanitarian organizations by selling super-cool shirts and other apparel
  • 3 magnets made from Sevenly stickers that are great for lockers or mini-fridges
  • 15 magnets made from PETA stickers that are also great for lockers or mini-fridges. 
  • 1 customized bracelet made by me. You choose colors and specify size. The bracelet will appear similar to this one in my web store, only it will say "ACTIVIST" instead of a name. 
  • The winner will also be featured on this blog with a photo, short biographical description, and their resolution. (The winner will be contacted for the photo and description, as well as the details of the bracelet after being selected. This will act as a conformation method.)
All entries must be received before February 1st 2014. There also must be more than 10 qualifying entries, or the contest will be canceled. If there are a large number of participants, I may add runner-up places with smaller but still awesome prizes. In the event of cancellation, a consolation prize will be available to any participants. I reserve the right to change the rules and awards at any time. I'm sorry if you don't think the prizes are cool. I'm a poor college student, remember?

Happy New Year, Everyone! Good luck! Feel free to comment and tell me what a great idea this is. Tell all your friends about this contest and encourage them to enter as well! Who knows. Maybe they'll share with you if they win.

*************** UPDATE: CONTEST IS CLOSED.

Wednesday, August 21, 2013

CTTVCC: Hangover Helper

Turn to page 38. Alright everyone. Let me just start off by saying that this is a phenomenal recipe. I may have mentioned before that I have never been a big fan of mayonnaise in the past. However, it made this breakfast sandwich taste super-delicious! In fact, probably because of this very recipe, I am beginning to really like the stuff. Really. I love the way that the taste of the veganaise combines with the flavor of the cheese. It is probably one of my favorite breakfast recipes I've made so far. Breakfast is my absolute favorite meal of the day. In fact, I'd probably be perfectly content to pretty much just eat breakfast food for the rest of ever. I mean, really. I'ts all kinds of delicious.

The recipe calls for:

  • 2 tablespoons vegan mayonnaise
  • salt, pepper, and onion powder, to taste
  • 8 vegan chicken strips, thawed
  • 2 slices vegan cheese
  • 1 bagel, sliced in half
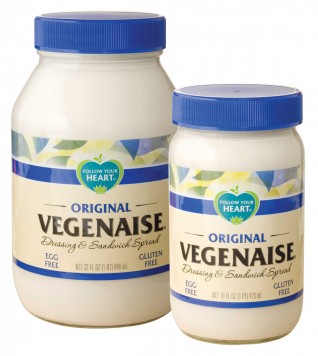
I used Follow Your Heart Original Veganaise for this recipe. I wanted to get the reduced fat stuff, but I didn't want that to maybe interfere with the flavor the first time I tried this recipe, as diet foods often do. 


I chose Beyond Meat lightly seasoned chicken-free strips because they are gluten-free and vegan. They also have one of the most convincing meat textures I've ever come across in fake meat. 


Any flavor of vegan cheese would probably work fine, and you don't have to get the pre-sliced stuff, but I chose Daiya Cheddar Slices. Admittedly, slices are a bit easier to work with.


I also have yet to find gluten-free, vegan bagels, so I again used English muffins instead. I used Food For Life brown rice English muffins, which are very yummy, just in case you were wondering. Also, one advantage of English muffins over bagels, is that you don't have food falling through the hole in the middle.


Here is what my finished sandwich looked like: 


This was super-yummy, and I will definitely be making this again. It's packed with protein and yummy veganness so I'm sure it would be great for making sure you can kick start your day with energy. It's also not the messiest thing out there, so you can eat it while you're getting ready in the morning. I seriously want another one of these RIGHT NOW. I'm sure you'll be as impressed with them as I was. This is definitely on my go-to recipes list. You know, to be honest, this would make a good power-snack, or lunch or even a light dinner. EAT IT FOR ALL THE MEALS! Enjoy!

Monday, August 19, 2013

CTTVCC: Vegan Mac 'N' Cheez

This recipe can be found on page 187. This is a pretty good recipe, though I admit I wound up making several adjustments to it. I've been searching for the perfect vegan macaroni and cheese recipe, and while I am still hoping to find or some up with one that tastes a little more authentic, this one isn't bad. In my opinion, it ended up tasting a little bit plain, so I'd pair it with some high-flavor sides.

The recipe calls for:

  • 1 (16 ounce) package elbow macaroni
  • 1/2 cup soy milk
  • 5 tablespoons nutritional yeast
  • 1/2 cup vegan margarine
  • salt, pepper, and garlic powder, to taste

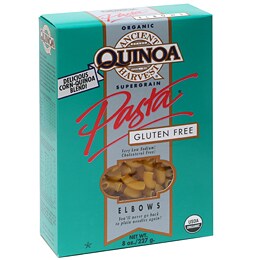
I used Ancient Harvest Quinoa macaroni, which is very yellow to begin with. Actually, I think that's where most of the color in the dish was coming from once I'd finished making the whole thing. I love quinoa pastas because they're higher in protein because quinoa is simply packed full of it. It's some of the best gluten-free pasta out there because many brands don't actually hold together very well, and just turn into mush. This, however, has rather good structural integrity.


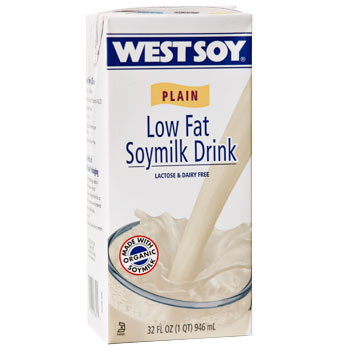
For soy milk, I used West Soy shelf stable soy milk. By the way, shelf stable alternative milks are simply a must. All too often, I've run out of fake milk when the store isn't open, and then my coffee, tea, cereal, recipes, etc. either don't turn out, or can't be made at all. Save yourself some drama. Keep a few cartons in your sock drawer.


I've finally switched to buying my nutritional yeast in bulk at my local health food stores. I still haven't found the exact sort of container I'd like to keep it in, but it'll probably end up going in a plastic-bag lined sealable canister of some sort.

For the margarine, I used Earth Balance Coconut Buttery Spread. This is some of my favorite butter replacements ever invented. Coconut is so good for you, an it has an extremely delicious taste. The only downside is that it remains rather firm, so you have to let it sit out for a while if you want to be able to really spread it smoothly.


Salt, pepper, and garlic powder were a random assortment of things from my parent's pantry. Like a mentioned at the beginning of this post, I added a few things in. I used red pepper in addition to the black pepper. I ended up having to use way more nutritional yeast because the sauce was too runny. I probably should have added more garlic powder, except for that I didn't want to have garlic breath when I was going to be hanging out with my boyfriend later. 

All in all, this is a decent recipe. It goes really well with veggies like sugar snap peas, corn, or broccoli. It also is delicious with extra-seasoned potato wedges or fries. I will probably try more macaroni recipes before I make this one again, but I can definitely see myself making this again. I suppose smaller kids might like this because younger children tend to prefer more bland foods than foods with a kick. If you did anything to this recipe to alter it, let me know in a comment, and tell me what you thought! I'm really excited to perfect vegan macaroni and cheese. 

Tuesday, August 13, 2013

Back to School

I'm taking a quick break from CTTVCC to address an upcoming issue many of us will be facing shortly, if not already.

So, one of the biggest problems going back to school for a vegan in pre-college levels or for college day students is what you can pack in your lunch. Well, never fear, I'm here to help you with that! Now, this is going to assume for the most part that you will have access to a microwave during your lunch hour. Sticking with the philosophy of The Vegan College Cookbook, I want to try and give you tips that are inexpensive, healthy (for the most part,) and delicious.

First, many of The Vegan College Cookbook's recipes work great for packing in a lunch. I have found that these recipes tend to generate a lot of leftovers. It's best to pack leftovers in a sealable microwaveable container if you intend to reheat the food. If it's something like a salad or something else that you don't have to heat, microwaveableness is then not necessary, but it never hurts.

Just a tip about salads though, if you're packing a black bean and corn salad or any other salad that has a lot of liquid, I would recommend draining it the night before you intend to eat it. It keeps it from getting quite as messy. If you don't want to waste the liquid, it makes a really great marinade for grilling tofu. Or if you don't have enough left for marinade, you can always add a little bit of another vegan sauce or dressing, and you can toss in a few herbs like rosemary, pepper, or whatever you like. Then you'll have plenty.

I must not overlook an obvious option. Fresh fruits make delicious sides for lunch. Bananas work very well, because they require practically no preparation. Citrus fruits like oranges, tangerines, clementines, or grapefruits are best pre-peeled and put into sealed containers. Peeling them in advance saves you time, and saves you a mess when you're trying to eat your lunch. Apples, pears, and other fruits with a core and stem can be eaten around the core, and thusly, do not require preparation, but again, if you want to save some mess, you can pre-cut them. If you do, I recommend dipping them in a bowl of lemon juice or orange juice immediately after cutting them, and before putting them into a sealed container. The same thing goes for peaches, plums, and other fruits with a pit. Berries and grapes require little preparation, so they work great as well. For grapes, I'd recommend taking them off the stem, and for strawberries, I'd say to cut the tops off, and dip them in a citrus juice before packing them into a sealed container that doesn't have a lot of extra space, so they won't roll around and get bruised. Melons, mango, or pineapple work best sliced into small chunks and packed into a sealed container with as little juice as possible.

On the other hand, many fresh veggies are also perfect for lunches. Some of my favorites are baby carrots, cherry tomatoes, and celery (chopped into smaller pieces,) stringless sugar snap peas, broccoli, cauliflower, cucumber slices, and sliced bell pepper. Some good choices of dips for those veggies would be peanut butter, almond butter, sunflower seed butter, cashew butter, hummus, or black bean dip. All of those options can be purchased in single-serving, doesn't-need-to-be-refrigerated packages, though buying them in traditional packaging is cheaper, and easier. I would avoid packing salad dressings to dip them in, because they are rather high in calories, with little redeeming nutritional value. Also, they're terribly messy.

There are many varieties of frozen meals that you can take from companies such as Amy's or Candle Cafe, but keeping them cold can be sort of a problem. Also, there's not always a good selection if you have to be gluten-free too.

Now,  an absolute must is shelf stable food. Why? Because I'm sure that you've forgotten to pack your lunch until the last second and grabbing a Clif Bar way too many times. Because I forget my lunch all the time, and I'm sure everyone else in the world does too. Whether you remember in enough time to grab something handy-dandy-healthy, or you stash a collection in your locker for those occasions like I do, not having to keep all your food cold can be a great thing. Here are some of my favorites:


As a side note, not all GoPicnics are vegan, and there are some vegan ones that aren't gluten-free. But, they're on sale this week at Target, so stock up if you have the chance. Now then, I hope that you found everything super-helpful. If you'd like to share some of your lunch favorites with me, I would absolutely LOVE to hear them. I mean seriously. I like variety, and trying new things. So, enlighten me. 

Tuesday, June 18, 2013

CTTVCC: Georgia Peach Cobbler

I apologize in advance for the unexpected, and thus, unannounced hiatus from my blog. There has recently been a series of unfortunate events in my life. . . More like tragedies actually. A girl who used to go to my school was murdered by her boyfriend, one of my cats passed away of old age, (Rest in peace, Arwen.) and my grandmother has been in and out of the hospital. I've been rather busy. But enough sad stories, let's get to talking about yummy food!

This scrumptious, and not-completely-bad-for-you dessert is located on page 295. This is a great comfort food, especially for those times when you have already eaten a whole pan of brownies, and you still need some comforting. This fruity goodness just wants to give your tummy a hug. I don't know about you, but I crave chocolate during the winter, but during the summer, I tend to want fruity desserts. Perhaps that's because subconsciously, I know that summer is the season of fruit, and that's why I want it more then. Anyway, this is something you should try next time you're feeling down. This relatively healthy, light, fruity dessert will make your tummy (and hopefully you,) happier in no time!

The recipe calls for:

  • 1 (15 ounce) can peaches with syrup
  • 1/4 cup quick oats
  • 1/4 cup corn flakes or granola
  • 1/2 teaspoon cinnamon
  • 1 tablespoon brown sugar
I used generic peaches but I made sure to get the kind that's in light syrup. This recipe would probably still work even if you got peaches "in their own juice" if you want to be extra-healthy. 

I used generic quick oats, cinnamon and brown sugar. Because I love cinnamon, I used a whole teaspoon of it. Cinnamon is great for you though, so I don't care if it's not exactly following the recipe. Speaking of not following the recipe exactly, I kind of went a little crazy with the oatmeal and granola layers, and ended up using twice the amount of the mixture then it called for. Oh well.

Here is my finished cobbler:


As you can see, the fruit to oats ratio is way off. It was still delicious. This is one of the simplest dessert recipes that I've ever made, and it's extremely satisfying. If I hadn't already decided not to remake recipes for myself until I'd gone through that recipe's whole section in the cookbook, I think I would end up making this 50 times before I finished everything else in desserts. I also would totally eat this for breakfast as well because it's got fruit, granola and oatmeal. That makes it breakfast food too, right? Well, anyway, I hope you enjoy this recipe just like I did!

Monday, June 17, 2013

CTTVCC: Piz-Tato

This recipe is on page 284. Starting out with this recipe, I wasn't sure what to expect. I stopped really liking potatoes a while ago, but now I'm starting to think that's just because I got sick of the way my family always fixed potatoes, which was full of butter and cream cheese, and cheese, basically, just dairy overload, which was also rather bland. This recipe has renewed my faith in potatoes. Not only was it good, it was really delicious, especially since I was expecting not to be impressed. I absolutely loved it. Next time I want vegan, gluten-free pizza, I won't bother whining about finding one of the holy grails of gluten-free, vegan frozen-in-a-box-from-the-grocery-store pizzas because making the gluten-free dough is normally more work than I want to do anyway. I'll just flip to this recipe.

The recipe calls for:

  • 1 large baking potato
  • 3 tablespoons pizza or tomato sauce
  • 1/2 cup shredded mozzarella-style vegan cheese

As I mentioned earlier, I wasn't expecting this to appeal to me very much, so, consequently, I did not get a large baking potato, I got a small potato. Because I got a baby-sized potato, I cut the rest of the ingredients in half. I definitely won't be cutting the recipe in half in the future, because this was so yummy!

I used store brand, garden-style pasta sauce, and Daiya Mozzarella- Style Shreds. Those two ingredients are a match made in heaven. Or perhaps made in America. . . but inspired by Italy! 

Here is my finished potato:


How adorable is that? They're like baby-pizzas!


Yeah, I wasn't sure how to eat them. Do you pick them up and eat them like pizza? Do you cut them into bite-sized pieces? I gave up guessing and mashed it all together. So, now it doesn't look that attractive, but it tasted amazing!

I really loved this recipe. I will definitely be making it again. I with there had been more of it. Oh well. At least I'm more open to the other potato recipes in the cookbook. I know I wouldn't have come up with this recipe on my own. turn a potato into a pizza? How often do people do that? Well I've decided: not often enough. Let me know what you thought by commenting on this post!

Sunday, June 16, 2013

CTTVCC: Bunny Butter Spread

Page 77 is where you'll find a little white rabbit who is terribly late for an important date, and decides he needs to snag this snack before rushing off to meet the Queen of Hearts. Okay, not really, but it is where you'll find the recipe for Bunny Butter Spread. This spread makes a delicious snack that I could eat forever. I'm glad this makes a limited amount.

The recipe calls for:

  • 1/4 cup grated carrots from the salad bar
  • 2 tablespoons chunky peanut butter
  • 1 tablespoon raisins
  • 1 tablespoon orange juice

I grated carrots from the produce section of the grocery store, because as school is out, I have no salad bars at my disposal. 

I used Jif Extra Crunchy Peanut Butter


Alright. It's confession time. I hate raisins. I tolerate them in my gluten-free cinnamon raisin bread, but I don't go out of my way to put them in food. However, I love craisins (dried cranberries.) I used  Ocean Spray Original Craisins instead of raisins, and you know what? It tasted way better that way. I think the craisins added a much better pop of flavor than boring old raisins ever could. 


Then I used store-brand orange juice. Hurray. Cheap.

Here is my finished spread:


The recipe suggested eating the spread on crackers. I haven't bought any gluten-free, vegan crackers lately, so I ate this with little tortilla rounds. They were perfectly bite-sized, and the slight amount of salt on the chips added a nice flavor to the spread. I will definitely be making this for future parties. If you're going to make this for a party, I suggest doubling or tripling the recipe, or maybe even quadrupling? It's really good, and you'll have to watch it to make sure that the one friend that everyone has who only comes to parties to eat all your food doesn't hog the whole thing. It's such a delicious recipe, I really don't blame the kid for wanting to eat it all. I know I probably could. I hope you all loved this! If you've tried the recipe with raisins and craisins, I'm curious to know which you liked better! Leave me a comment, and tell me about yours!

Saturday, June 15, 2013

CTTVCC: Pantry Raid Pasta

This recipe is on page 163. This recipe is phenomenally delicious. It tasted like I had put a bunch of effort into it when really, you just throw it together. This honestly tastes better than some restaurant Italian food I've had, and it's ready so much faster, and costs so much less. Even my non-vegan family members fell in love with this. I foresee making this a lot in the future.

The recipe calls for:
  • 1 (16-ounce) box elbow pasta
  • 1 (15-ounce) can diced tomatoes
  • 2 (8-ounce) bags vegan chicken strips
  • Salt and pepper, to taste

Okay, so I didn't use elbow pasta. But isn't that the point of the pantry raid? I had gotten a sampler box of a bunch of random gluten-free foods from Vitacost, and the company had sent a gluten-free penne the month that I bought it. The package was, most appropriately, almost completely in Italian, but lucky for me, there was also a French section, and I was able to figure out that the only ingredient in the pasta was corn. It was all just made of corn. I found it a little hard to believe, but I figured that I wouldn't die from it. After I cooked it, I realized that it probably was entirely made of corn because it lost all structural integrity, and basically shredded itself, so obviously it didn't  have a very effective binding agent. It tasted great though!

I used generic diced tomatoes, but I used ones with Italian seasonings mixed in with the tomatoes. I would definitely recommend using  tomatoes with Italian seasonings because you don't want your pasta to taste bland.

For the faux chicken, I used a mix of Beyond Meat Grilled Strips and Beyond Meat Lightly Seasoned Strips, just to mix things up a bit. Actually, I just didn't have enough of the lightly seasoned strips to make the recipe, so I opened the other package to augment it.

I tried not to use too much salt, but I was very generous with the pepper. I am a firm believer that pepper helps enhance the flavor. Also, I've heard that eating spicy foods boosts your metabolism. Maybe it'll counteract some of those pasta-carbs. 

Here is my finished dish:


Mmmmmm. That stuff was crazy-good. Can you see all that shredded pasta? Even though it's molecular integrity was compromised, it still tasted amazing! I just can't get over how delicious this was. If I wasn't trying to cook through the whole cookbook, I'd probably stop and just make this over and over for at least a week. It's that good people, it's that good. Let me know how yours turned out, and if you liked it as much as I did by leaving me a comment below. Comments are always welcome!

Friday, June 14, 2013

CTTVCC: Dirty Chick (Pea) Clean-Up Salad

Turn to page 115, please. This is a really delicious recipe that I know for sure I would not have thought of myself. It's a combination that I wouldn't have come up with, but yet, compliments each other very well. It's savory and sweet; soft and crunchy at the same time. It's a simple recipe that I know I will turn to in times of need, or need for something to pack as a lunch on those days when I don't feel like trusting the cafeteria.

The recipe calls for:

  • 1 (15.5 ounce) can chickpeas, drained and rinsed
  • 1/4 cup diced celery
  • 1 Red Delicious or Gala apple, cored and diced
  • Salt, to taste

I used store brand chickpeas, and fresh celery, and a Gala apple. My favorite kind of apple (right now anyway,) is the Pink Lady apple, which I will use next time I make this salad. It would also be interesting to try using a Granny Smith apple for a more sour taste. Basically, it doesn't matter what kind of apple you use. The kind of apple will, obviously, slightly change the taste of the salad though. I would love to hear what kinds of apples you've used, and how you thought it tasted! Just leave a comment on this blog entry to let me know.

Also, I love celery. All the sources I've come across say that your body burns more calories to digest celery than the celery contains. Essentially, celery is negative calories. Figured I'd throw that out there, just in case you didn't know.

I only used a small pinch of sea salt, because I knew the chickpeas would taste great salted, but I wasn't sure about the apples.

Here is my finished salad:


This salad is really easy and fast to make. It doesn't require any baking, it doesn't really matter if your proportions are slightly off, you can eat as much or as little as you like at a time without wasting, or having half eaten sandwiches or whatever littering your fridge. It's packed with protein and fiber as well as good flavor. It makes a great snack or main course, and every bite is delicious. I hope you love this!

Thursday, June 13, 2013

CTTVCC: Black Bean and Corn Salad (Salsa Remix)

Hello to all my charming readers, this recipe is on page 113. This recipe is great. It's versatile as it can be eaten on chips, in a taco or wrap, by itself, on a bed of lettuce, or even upside down. Though, I wouldn't recommend the latter. I really liked the taste of this. I think that the beans and the corn compliment each other so well. While the Black Bean and Corn Salad (Extended Dance Mix) is a delicious zing of flavors, sometimes less is more. I guess it depends on the person, or maybe more specifically, on said person's mood. This is another good recipe for parties, by the way, and I wouldn't plan on having leftovers.

The recipe calls for:
  • 1 (15 ounce) can black beans, drained and rinsed
  • 1 (8.75 ounce) can corn, drained
  • 6 tablespoons lime juice (fresh or from a squirt bottle)
  • 5 teaspoons olive oil
  • 1 tablespoon chives
  • 1/2 cup salsa
  • salt and pepper to taste
I used Earth Fare brand beans, corn, olive oil, salsa, salt, and pepper. I didn't use lime juice, because I didn't have any, but I had a bunch of lemon juice, and I figured that it's probably close enough in taste. I used Real Lemon brand lemon juice, though, I'm sure fresh lemon juice would taste better. Admittedly, fresh lime juice would taste even better than that, but hey.

By the way, I would recommend using a medium salsa at the mildest. This is the sort of thing that tastes best with a bit of a kick. I only had mild salsa in the fridge, and I didn't want to open another jar, so I just used cayenne pepper instead of black pepper. It did the trick. Of course, it makes it spicier the longer you're eating it, but hey, it helps counteract the law of diminishing return, since each bite has flavor that doesn't just start getting dull after a while. Of course, if you combined cayenne pepper with hot salsa, you might be able to make some cash by selling the drinks at your party, or perhaps use the opportunity to force people into trying your favorite fake milk? Just kidding. Don't do that. It's not a good way to make friends.

Here is the evidence of my food DJ skills:


The olive oil makes this look especially shiny. It's just saying "Eat Me!"

Perhaps this would be a good recipe for trying to determine which brand or tortilla chips actually taste the closest to Mexican restaurants. I mean, a bunch of them claim to, but which ones are telling the truth? This is a great excuse for playing chip-detective. Or if you melt some of your favorite vegan cheese in a taco shell or soft tortilla, this makes a great entree. You can pull this out when you want an unboring snack, especially when you get early-hour-of-the-morning-munchies when you're trying to finish up a project last minute. That sort of situation would be the perfect time for you to use the spiciest combination possible, you know, to wake yourself up. Don't get me wrong, I love my coffee, but sometimes, your body just grows immune to the effects of caffeine. I would definitely try this recipe out, because let me tell you, even if you make it as mild as possible, it's still delicious!

Wednesday, June 12, 2013

CTTVCC: Ramen Holiday

This recipe is on page 131. This is a simple go-to recipe that is perfect for rainy days. I don't know about you, but when the weather is nasty outside, I always want soup. From tropical storms to snow storms, it's my bad-weather panacea (cure-all.) This is similar to how my mother used to always fix ramen noodles when I was a kid. It adds more volume to the soup, but I am not sure whether she did so because it would give the soup more nutritional value, or because then she wouldn't have to use as many packs of ramen to feed me and my three sisters, plus my parents. Well, that was a nice trip down memory lane. Reminiscing time over now.

The recipe calls for:
  • 1 package ramen
  • 1 cup frozen mixed Italian veggies

I used McDougall's Pad Thai Noodle Soup, and generic frozen veggies. Unfortunately, all I could find in my freezer was Normandy-style veggies not Italy-style veggies. To be perfectly honest, I prefer French to Italian anyway. The veggie mix had broccoli, cauliflower, carrots, and squash. That's some pretty high-class stuff there.

Here's my finished soup:


Well, I really liked this recipe, especially my Normandy-style veggies. And my Pad Thai. I would definitely recommend adding veggies to ramen for the exact two reasons my mother used to use. If you are trying to get by on a small budget, we all know ramen is cheap. But you can stretch your ramen and get some extra nutrients into your meals by adding frozen vegetables, which also tend to be pretty cheap. Now, what would be super-great, would be combining this recipe with the Rent's Due "Cheezy" Ramen, and throwing a little bit of nutritional yeast in there. That would really be perfect. Hope you all enjoy this recipe!

Tuesday, June 11, 2013

CTTVCC: Chick-Un Parm Sammich

Open the Vegan College Cookbook to page 49 for this recipe. This is a delicious, savory recipe that is great for when you want some Italian finger food that is relatively cheap, and you don't mind making a bit of a mess. Or a lot of a mess. I guess that depends on your level of skills.

The recipe calls for:

  • 1 vegan chicken patty
  • 2 slices whole-wheat bread
  • 2 tablespoons marinara sauce
  • 1 slice vegan mozzarella cheese

I used Beyond Meat Lightly Seasoned Strips for the chicken, which, I know, isn't a patty. But It's the only gluten-free, vegan chick'n I've been able to find. They worked fine though. Granted, a patty would have been a bit easier to eat, but still. I'm just waiting for Beyond Meat to come out with some more products that I can eat, and use for making these recipes!

Obviously, with my gluten-free restriction, whole wheat bread is a bit out of the question, so I used Food for Life Rice Millet Bread. If the point of suggesting whole wheat bread was just so people would pick a more wholesome bread than basic white bread, then I'm sure this counts. 


I used generic marinara sauce, but I picked one that was garden vegetable style so it had a bit more flavor than plain tomato sauce. Plus, extra veggies! Extra veggies are a good way to roll.

Follow Your Heart Vegan Mozzarella Cheese was the only vegan mozzarella cheese I had, and it wasn't pre-sliced. So, I used more than one slice of it otherwise it wouldn't have covered all the chick'n. Don't want my fake meat getting scandalous, now do I?

Here is my finished sammich:


If you can't tell, I really like my vegan cheese.

This is a nomalicious recipe that I will definitely be making again. It's perfect for using up little bits of leftover pizza/ pasta sauce. I must say though, don't wear a white shirt while you're eating it. It's a very high-risk sort of thing, putting marinara on a sammich. In fact, wear red. Or something dark. And for the love of vegan food, don't eat this on a first date. I probably wouldn't even eat this with my boyfriend around unless he was preoccupied, and wouldn't see me, or if I made it in a wrap instead. But really, if you won't be humiliated in front of someone you're trying to impress, or you won't be ruining one of your favorite shirts, it is so worth it.