Showing posts with label food. Show all posts

Tuesday, October 28, 2014

Fall Veggie Favorites

So, as you are surely well aware at this point, it is Pumpkin Everything Season. (Also known as Autumn or Fall.) However, there are lots of other kinds of squash that are soooo in this season. Today, I'm hopefully going to convince you to try a slightly less common one: Spaghetti Squash.

Why is it called spaghetti squash? Well, for starters, it's a squash. And when you prepare it, it looks a whole lot like spaghetti. Here's the part where I blow your mind. (Maybe.) You can even eat it like you would eat spaghetti. OMG. This is too much! But I'm serious.

Are you looking for something to eat that's easy, cheap, delicious, satisfying, vegan, (also gluten-free,) and good for you? (Note: vegan food is not always actually good for you. Might I remind you, french fries and Oreos. It's okay. We're all guilty. But anyway. . .) You really should try it. I got a medium-sized spaghetti squash for under $3 at Trader Joe's, and I got about 6 servings out of it. Add marinara sauce with gluten-free, vegan faux beef crumbles (for protein,) and vegan Parmesan cheese, and you've basically got everything you need in a meal in one dish. (BTW,  you can get all those things, except maybe vegan Parmesan, at Trader Joe's for cheapsies. P.S. They'll also be organic.) Preparing Spaghetti Squash is also really easy, like I said. Basically, you vent your frustration with *insert noun here* by stabbing the squash several times. Then you put the squash on a plate or even just some paper towels, and cook it in the microwave. NOTE: Cooking times vary depending on the size of the squash. Just look it up on the internet. It's pretty simple. Again, mine was a medium squash. I cooked it for 20 minutes, and it was perfect. Whenever you're done cooking it, pull off the stem carefully, and cut the squash in half. Scoop out all the little spaghetti-looking parts, and eat it! No boiling water or stirring necessary. Congrats. You're so fancy. That would cost you about $10 per plate at Ruby Tuesday. (My version is normally less than $3 a serving with toppings, and you can eat it at your own house. What.)


This is one of the most amazing vegetables out there, so what are you waiting for? Do you have a good spaghetti squash recipe? (Hint: You can also eat this stuff NOT like spaghetti. What.) What do you think about spaghetti squash? Have you ever tried it? Do you love it? Is it your favorite thing? Let me know in the comments! Until next time! Much love.


Friday, September 5, 2014

Food Finds Friday: Fall Favorites

First, I would like to apologize for so much alliteration in the title. It was just so perfect. Alright. So, first of all, dear vegans, Fall is coming, and with it, the jealous lusting after pumpkin spice lattes that still aren't vegan. (Though, if you have seen those ingredient list things circulating the internet, you're probably a lot less jealous now.) I'm sorry to say that I have yet to come up with the perfect vegan pumpkin spice latte. I'll work on that. But I have found some delicious things that will make it all better. (Hopefully.)

First, Archer Farms hot chocolate. I'm pretty sure it's available at Target exclusively. I haven't checked all the flavors they have, but FYI, not all of them are vegan. I do know that the dark chocolate, peppermint, and coconut macaroon flavors are vegan though. I like making them with either coconut milk or almond milk, which makes them super-creamy and wonderful. If you're a fan of Mayan/Aztec hot chocolate, you can add a VERY SMALL dash of cayenne pepper to your dark chocolate powder to give it that tiny extra kick. Be SUPER careful though. The only way to fix it if you add too much pepper is to make a ton more of the hot chocolate, and mix them all together until it's diluted enough. (Then you'd probably have to store the rest in the fridge and reheat it when you're ready to drink it.) So, while it's not a pumpkin spice latte, I hope this is a fall beverage you'll enjoy.


The other find I have for you today actually IS pumpkin spice. However, it's not a drink. Pumpkin Spice WAFFLES, everybody. These are gluten-free, AND vegan. On top of that, they're made with super-healthy things like quinoa and flax. OMG. I cannot express in words how delicious these are. My little sister, who is neither gluten-free, nor vegan, ate an entire box of them while I wasn't looking. This might be my new answer to "If you were stranded on an island with only one food, what would it be?" Last time I checked, Whole Foods had them on sale. Try them! You will like them! You will see! I think I'm going to go clean out my freezer so I can just load up my freezer completely full of these. (Perhaps I should just come up with a gluten-free, vegan pumpkin spice waffle recipe on my own. OMG SO YUMMY.) This is fabulous as breakfast or dessert. Or both.


Do yourself a favor, and go try both these things. After you've tried them, I'm betting you won't miss the PSL (Pumpkin Spice Latte) at all. VEGAN PUMPKIN POWER! Let me know how you like these in the comments below! Also, If you have found any other fabulous pumpkin things, let me know! I want pumpkin all the things.

Friday, August 15, 2014

How to Be Vegan and a Little Less Poor: Part 2

Hi everybody! So in my last post, How to be Vegan and a Little Less Poor: Part 1, I gave 5 tips for saving money on food purchases. I talked about couponing and the rebate apps that I personally use. I'm really happy that a lot of you found it helpful! A few people asked me though about other ways to save money on vegan products. One of the ideas that was mentioned was purchasing items in bulk. That can be a really great way to save money. So, I'm going to start out 3 tips on how to bulk-shop, and then give you 3 bulk products that you should always keep on hand.

Tip #1: Check the price per unit. Whether the unit is ounces, grams, milliliters, or whatever, you'll only save money if the bulk price is a smaller price per unit. If you're at a bulk store like Costco, this can be a little more difficult, because they don't have regular sized items to compare to. (Though, you can always pull them up on a smart phone.) I know there were several times I went to a bulk store and found a product I normally buy in regular sizes, only to realize that I wasn't really saving any money by purchasing 5 times as much of it. If you're buying a bulk item at a regular store, you can often compare it to a similar, pre-packaged product.

Tip #2: Buy what you like. Bulk purchases aren't always the best time to try something new. You're running the risk of getting stuck with a whole lot of something if you don't end up liking it. If you're willing to take that risk, then that's up to you. For example, I've found gluten-free, vegan veggie burgers at Costco before, and they're pretty good. I had never seen that brand before, so I didn't know if I was going to like it, but I just decided that I'd find a way to make myself eat them even if I didn't like them. (Even though, as it turns out, I did like them.)

Tip #3: Don't buy too much. When purchasing in bulk, make sure you'll have enough space to store what you don't immediately use. For example, have some sort of a dry, sealed container to keep your nutritional yeast in. It won't keep well in the little plastic bags the grocery store provides. (My cats apparently really like nutritional yeast, and they can easily tear those bags open.) I sometimes go crazy when I'm at the grocery store, and one time in particular, I ran out of freezer space before I could fit in all of the bulk veggie burgers. I put some of them in my fridge, but I couldn't quite eat them fast enough, and a whole case of them went bad. If you are getting so much that you can't use it before it spoils, you're not saving money, you're wasting it.

Alright. Hopefully those ideas can help guide your bulk-shopping. Next, I have a few ideas on what to purchase in bulk. If you're at a bulk store, and you can find bulk products that you like, knock yourself out. But, here are a few staples that you should always keep on hand.

Product #1: Quinoa. Quinoa is a seed that is most often eaten as a grain. It is one of the only plant-foods to have complete protein. That means that it contains all of the protein variations that people need to be healthy. Quinoa is a very versatile food that can be eaten in salads, baked in foods, used as a flour, eaten plain, etc. There are so many yummy and creative ways to eat it. It doesn't have a very strong flavor, so it can be added to just about anything, and it can be a great part of any meal. (Even breakfast.) Quinoa is basically the seed equivalent of tofu. I have purchased it prepackaged at a bulk store, and I have also purchased it in a bulk bag from a regular store, but I eat it a lot, so I always buy it in bulk. (Bonus tip: Costco has pre-washed bulk-packaged quinoa, which makes preparation a lot easier.)

Product # 2: Nutritional Yeast. I haven't seen a pre-packaged bulk bag of nutritional yeast, though I know you can sometimes buy cases of the canisters of it. I haven't done the math on that though, so I don't know if it's a good deal. I normally buy nutritional yeast in scoop-it-yourself bulk bags at Whole Foods or Earth Fare. Nutritional yeast is another great source of protein for vegetarians and vegans, (or anyone really,) and I use it in a variety of recipes. I would definitely recommend keeping it on hand.

Product # 3: Dried Beans. For me, I always go for chickpeas (garbanzo beans) and black beans. Those are the absolute best in my opinion. They're very versatile, they store well, and they aren't too hard to cook. (As a bonus, there are several ways to make soup broth with the water you re-hydrate them in, which gives you a little more value for your money.) Beans are a great source of protein for vegetable based diets.

Of course, these aren't the only products I purchase in bulk. I also have bulk oatmeal to either eat as oatmeal, or make into flour. I buy spinach in bulk sometimes, and peanut butter, (I would totally buy sunflower seed butter in bulk if I could find it at a bulk store,) and other assortments of fruits and veggies. (Those can be a risk sometimes with a mad dash to eat them all before they spoil.)

Anyway, I hope this has been helpful! If you have any other suggestions, I'd love to hear them. If you think I should blog about another specific aspect of making a vegan lifestyle more affordable, let me know, and I'll get right on it! Let me know what you thought by leaving a comment! Thank you so much to all my lovely readers! Happy shopping!

Thursday, August 14, 2014

How to be Vegan and a Little Less Poor: Part 1

Hi again everyone! I know I keep saying how I'm going to post way more regularly and have tons of interesting things to tell you, but I keep getting really busy and not having a lot to say. I'm sorry. But guess what? Today I have something really awesome that I want to share with all you lovely people out there. (Before anyone asks, I'm not getting paid to promote this stuff either. They're legitimately my own personal recommendations.)

One of the biggest concerns that people frequently tell me, and one of the main reasons people hesitate to go vegan is that sometimes vegan food can just be downright expensive. (Now, I know there are tons of cheap recipes in the Vegan College Cookbook, but sometimes, it's still a tad expensive.) But even if the money isn't a problem for you, it never hurts to have more of it right? So, I'm going to give you 5 tips and recommendations for how you can get the vegan products that you want, and have a bit more money when you're done.

My first tip is perhaps a bit obvious, but always check for coupons! Alternative milk products always have coupons out. Brands like Silk, So Delicious, and others have lots of coupons available all the time. Normally. you can find them just by doing a quick search on the internet. Other times, grocery stores print out coupons with your receipts, so hang on to those. I frequently get coupons for veggie burgers that way, because they give you coupons based on what you already buy. The best part is, frequently, you can stack coupons with other deals and savings, especially if it's a manufacturer's coupon. If you've gone to the store, and forgotten to check for coupons, you can normally pull the coupons up on some sort of mobile device, so you can access them really easily.

My next tip is use the Ibotta app.


When I first heard about this app, I thought it sounded a bit too good to be true, but it's completely legit. Ibotta has cash rebates for specific products and stores. I primarily use it for groceries, though, they have rebates for lots of other categories like clothes, beauty products, pet supplies, restaurants, electronics, etc. Many of those categories have rebates for a certain amount back when you spend another certain amount, which is great if you were going to shop there anyway. But anyway, back to groceries. Ibotta has a lot of different products that can be purchased from a lot of different stores. They have rebates for stores like Walmart, Costco, Bi-lo, Walgreens, Whole Foods, and more. They products they offer rebates for changes, but they often have rebates for So Delicious, Enjoy Life, Peace Cereal, and several other vegan-friendly brands. Sometimes they also have rebates for fruits and veggies, and the brand doesn't matter. One nice thing is that you are earning the rebates on top of whatever sales or coupons you use to buy the products, which means you can get a phenomenal value for these products. Also, as the app advertises, you are rewarded with cash, not just with more coupons. You can send your rebates basically straight to your bank account, which is super-convenient. And, it's really easy to rack up a lot of cash from rebates. Honestly though, one of the most amazing things about this app, is that it lets you benefit from teamwork. Sure, you can be saving money all by yourself. But, they have things like teamwork bonuses as well. Your team is made up of any people you refer or are referred by and / or any people you know connected social media who also use the app. In any given month, when you and anyone in your team redeem any rebates, it goes toward the teamwork bonus. There are multiple levels of the bonus, but basically, when you and your friends are earning money, you earn even more money. (Of course, these can be completed by yourself, but it's easier to complete them with friends.) If you're new to Ibotta, and would like to be in my team, use the referral code "arbiza" when you sign up, or send me a message using the Contact Form on my blog, and be sure to include your email and a note saying you're interested in an invite to this app. You'll probably get a ton of money just from all the rebates I've redeemed, just FYI. Obviously, not all the products they offer rebates for are vegan, but you don't have to buy them. So, it's okay. Ibotta has a minimum cashout of $5, but that's really easy to earn.

Tip # 3 is use the Checkout 51 app.


This app is similar to Ibotta, but not exactly the same. For starters, it's really only for groceries. It's a little bit easier to use, and it doesn't matter what store you buy the products at. However, there aren't any kind of team bonuses on Checkout 51, and there aren't quite as many different rebates available. But, Checkout 51 frequently has a lot of rebates for fresh veggies and fruits, and a lot of their other rebates aren't brand-specific. That means that when they have a rebate for bread, you could get gluten-free, vegan bread, and they'd still give you the rebate. Checkout 51 also has some rebates for vegan brands though, like Earth Balance. Checkout 51 has a minimum cashout of $20, which might take you a little bit longer, but it certainly isn't hard to get. Checkout 51 also has a weekly drawing for $500 that you qualify for if you spend at least $60 on any single shopping trip during the week. (Trust me, $60 sounds like a lot, but it's way too easy to do.) Sometimes the rebates on Checkout 51 overlap with Ibotta, which means you get rewarded twice! Twice is nice.

Another tip is to use the Receipt Hog app.



This app rewards you for groceries (and also convenience store trips,) but unlike Checkout 51 and Ibotta, it doesn't even matter what you buy! Any groceries from anywhere earn you coins on Receipt Hog. The more money you spent on a trip, the more coins you earn, but you get rewards no matter how much you spent. You can also get spins on the Receipt Hog "slot machine" for every receipt you upload after uploading at least one receipt per week for 5 weeks straight. You won't always get a reward for this, but you have the opportunity to earn a few extra coins. You can redeem coins either for a $5 check in the mail, or a $5 Amazon gift card. It takes a little bit more time to earn the rewards on this app, but you can get rewards for whatever you want from whatever store basically. On top of all that, you can use this app to get rewards in combination with the other apps for sure, because it doesn't matter what you bought, or where. If you'd like an invite to this app, send me a message using my Contact Form, and let me know you are interested in an invite to this app.

My last tip for today is use the Punchcard app.


Punchcard is one of many apps that allows you to earn mPOINTS. Your mPOINTs can be redeemed for a variety of products and giftcards, though the absolute best value is the $1 Amazon giftcard, FYI. (Other apps include a fitness tracking app called Nexercise, a super-fun, How To Train Your Dragon game called Dragons: Rise of Berk,  and for iPhone users, you can also earn mPOINTS with the MyPlate app by Livestrong.) Punchcard rewards you for uploading pictures of your receipts from grocery stores, restaurants, gas stations, and actually just about anywhere. (I'm including this app though because you can get rewarded for grocery receipts.) Again, you can use the same receipts to earn rewards on this app as you could on all the others. (Plus some.) When you upload a picture, you get a chance to spin their little "wheel of fortune" which will give you a certain amount of mPOINTS. You can earn bonus mPOINTS by sharing to a social media website. (You can always immediately delete the post.) When you go to claim your mPOINTS, you are frequently given even more bonus opportunities, like taking quick surveys, watching short videos, viewing some other sort of ad, or downloading and launching a promoted app, (which you can always immediately uninstall.) It's really easy to earn enough mPOINTS for a $1 amazon card especially if you use multiple apps that earn mPOINTS (Have I mentioned that the How To Train Your Dragon app is super-fun?), though you can only get 1 of any given reward per week. This app is a little bit less exciting than the others because you can't just get cash from it, but like I said, if you are getting those $1 Amazon giftcards every week, they add up. If you're a poor college student like me, that means slightly cheaper textbooks, (which turn into real money when you re-sell them at the end of the class.) Or you can also, you know, buy just about anything on amazon, like new gadgets or clothes, all of which are important.

Alright everyone. Thanks for reading, everyone! I know this was a bit of a longer post, and I know I recommended a lot of apps. But seriously, they don't take that much time, and they can help save you lots of money on products you'd be buying anyway. I really hope you found these tips helpful. If you know of any other apps that help you save money on groceries or other vegan / cruelty-free products, PLEASE let me know in the comments. I will love you forever!

Monday, June 30, 2014

CTTVCC: Micro-Ritos

Hello Everyone! This recipe is on page 155 of PETA's Vegan College Cookbook. This is a particularly easy recipe. As is often the case, it makes a LOT of food. I'd recommend cutting the recipe in half unless you're making enough for you and a few friends, or unless you just REALLY love burritos. I know it's been a while since I did a Vegan College Cookbook post, so here we go!

The recipe calls for:

  • 1 (8-ounce) bag vegan chicken or steak strips
  • 1 (16-ounce) jar salsa
  • 1 (15-ounce) can black or pinto beans
  • 1 (10-ounce) package Mexican-style vegan cheese, grated
  • 1 package (10-inch) tortillas
  • 1 bag boil-in-bag brown or white rice (optional)
I chose to use Beyond Meat Grilled vegan chicken strips. They're gluten-free too.

BeyondMeat_Package_Nutritionals_web_LS_042114

I used Target-brand salsa, and Earth Fare brand black beans.

I didn't have any Mexican-style vegan cheese, so I used half a bag of Daiya Cheddar shreds, and half a bag of Daiya Mozzarella Shreds


I made my first burrito on a 10-inch tortilla, but the tortillas kept falling apart, and that much burrito was a little bit too much for me to eat. So, I switched to little 6-inch corn tortillas of some obscure brand. I also decided that since the rice was optional anyway, I'd substitute quinoa to make the burritos have a bit more protein. Besides, I had precooked quinoa sitting in my fridge taking up precious space.

Here is what mine looked like:


As the picture makes very obvious, this is horribly ugly. But then again, you wrap it in a tortilla so you don't have to look at it. The physical attractiveness of this food is inversely proportional to the yumminess. (That means it tastes great!) 

So, if you chose to make the recipe differently, or even the same as I did, I'd love to hear how it turned out. Please, leave a comment and tell me what you thought of the recipe!

Friday, June 20, 2014

Food Finds Friday: Faux at Trader Joe's

I love Trader Joe's. It's a cute grocery store, it has lots of gluten free and vegan products, and it's inexpensive. We got one in my city a few years ago, and since then, I've fallen in love. While I could go on for ages about the wonderful things I've found there, this post is going to focus on only faux dairy products.
 
First, they have some amazing soy coffee creamer. (Not to mention amazing coffee.) I love this stuff. It's delicious, and it helps me survive mornings.


Next, I've found the most wonderful vegan cream cheese there. You may recall a post I wrote a while back that compared different vegan cream cheeses. Oh my. If I'd found this stuff then, I would have included it. This is the most delicious vegan cream cheese I've ever tried. The texture isn't 100% like the real stuff, it doesn't taste 100% like the real stuff, but guess what it is 100% of? BETTER!  Oh my goodness. I make whatever excuse I can to eat it. It's amazing. Love at first bite.


My last favorite to mention now is maybe not really faux dairy, because most sorbet doesn't have dairy anyway, but if you think of it as fake ice cream, I think it counts. Trader Joe's mango sorbet is divine. I adore this stuff. In moderation of course. My sister on the other hand, would eat the whole carton while I'm not looking if I'm not careful.


I hope this has been helpful! There are so many other wonderful things at Trader Joe's, like vegan yogurt, tofu, vegan hot dogs (they're also gluten free by the way,) etc. And I plan to write about more amazing finds from there soon. Have you find anything wonderful at Trader Joe's? Let me know about it! Leave a comment, and share with your friends!

Thursday, June 19, 2014

Original Recipe: Vegan Chicken and Broccoli over Spaghetti

Alright. So first things first, the name isn't 100% accurate. Honestly, you can use whatever pasta you want. Of course, whatever noodles I use are going to be gluten-free as well, and I prefer using more string-like noodles like fettuccine, angel hair, or even pad thai noodles (obviously not with pad thai sauce for this.) But like I said, really any pasta will work. This is a variation of a favorite recipe in my family, and my family has traditionally used spaghetti.


So what you will need:

  • a regularly-sized package your choice of pasta, cooked (gluten-free if needed)
  • 2 cups unsweetened alternative milk (I prefer flax milk)
  • 2 tbs. corn starch
  • 2 tbs. vegan butter
  • garlic powder, salt, pepper to taste
  • 1 small package of frozen broccoli, thawed (you can use broccoli with other veggies mixed in)
  • 1 package of vegan chicken, chopped to bite-size (Beyond Meat is good for gluten-free people)
  • vegan cheese, parmesan or mozzarella 
  • microwave-safe pan that will hold all the pasta and also fit in the microwave, greased
  • large microwave-safe bowl
How to make it:
  • In microwave-safe bowl, melt vegan butter into alternative milk.
  • Add cornstarch to the butter and milk, and whisk until evenly mixed.
  • Add garlic powder, salt, and pepper to taste.
  • Mix thawed broccoli and chopped vegan chicken with the cream sauce.
  • Spread cooked pasta evenly over the bottom of the pan. 
  • Pour chicken, broccoli, and sauce over the pasta.
  • Sprinkle on desired amount of vegan cheese.
  • Microwave for 10 minutes on high or until veggies are hot. 
  • Allow to cool to an edible temperature, and enjoy!


WOAH! That's so simple! Really. It's not very hard. It's also very satisfying because it has carbs, veggies, and protein all in one dish. If you want to look fancy, you can serve it with salad and / or vegan garlic bread, or you can eat it by itself.
Let me know if you tried it! Let me know if you made any alterations or substitutions, and how they turned out! If you have any pictures or reviews on this, I'd love to see them. I want to know what you thought. 

Monday, June 2, 2014

Original Recipe: Nearly-Instant Taco Wrap

So, this is a really basic, simple recipe. I'm pretty sure a 5-year-old could make it without even making that much of a mess. I don't know why, but I've been craving tacos a lot recently. And so I make them. And I keep on wanting them. Does that mean they're my favorite food? I don't even know. Maybe it's because these are actually pretty good for you, and they're so ridiculously filling. I make them gluten-free and vegan, (obviously,) and they're super-easy to make free of whatever else you need it to be free of. They could be a snack, or a meal. That all depends on how hungry you are, and how much you make.

What you will need:

soft tortillas
vegan taco filling (as in fake meat)
vegan sour cream
vegan cheese
fresh spinach

What I use:


http://www.tofutti.com/wp-content/uploads/2013/02/SourCream-Non-Hydrogenated-Better-Than-Cream-Cheese.png


And spinach. 

What to do:

Place a tortilla on a microwave-safe plate. Spread desired amount of vegan cheese out over one side of the tortilla. Add desired amount of taco filling in a column on the center of the tortilla, leaving about 1.5 inches of space from the end on one side. Microwave for 30 seconds to a minute. Add desired amount of spinach on top of the column of taco filling. Add desired amount of sour cream to the column as well. Fold the end with space up and the sides in so that you can eat it with your hands. Enjoy!

Here's what mine looked like:


Words. Cannot. Describe. (And I will proceed at an attempt at verbal description anyway.) This is really super-amazing. I still don't know if it counts as a recipe. . . Because You aren't really COOKING anything. . . Whatever. This counts. So good. I said it was pretty good for you at the beginning of my post. It is. veggie crumbles / taco filling has a TON of protein. Fake cheese also has lots of protein. I'm pretty sure even vegan sour cream has a decent amount of protein. And let's face it, as delicious as iceberg lettuce is, spinach has way more goodness in it, like iron, calcium, antioxidants, etc. 

I'd love to see pictures of your own taco wraps! If you made these, let me know how it went! What did you think? Did you like it? Is it your new favorite thing? Did you make any awesome changes? Hit me up! Leave a comment. Can't wait to hear how things went!


Friday, May 23, 2014

Food Finds Friday: Chocolate Edition

As I've mentioned recently, I've found some pretty impressive things in grocery stores recently. REALLY impressive. For any chocolate lovers out there, (this should be just about everyone in existence,) I've found some absolutely DELICIOUS ready-made chocolatey desserts. (Are you drooling yet?) I'm going to be sharing 2 items that are both gluten-free, and vegan. Both can be found for sure at Whole Foods, and probably several other health food stores. Are you ready?

Set?

LET'S GO!

1. Zen Pudding


This pudding if so rich, you'll forget you're a poor college student. Or maybe that's just me. This stuff is really great though. I totally enjoyed it. I had to make myself ration it out, or I would have eaten the whole pack of four in one sitting. They have several flavors, including chocolate, vanilla, chocolate and vanilla, and chocolate almond milk (depicted above.) It is a tiny bit more on the expensive side though. While I really enjoyed it, I probably won't buy it often, especially when there are several Vegan College Cookbook recipes for chocolate pudding, such as Break-Up Pudding! If you make the pudding yourself, there's more to go around. So, my final verdict is: it tastes great, but the price is not right.

2. The Piping Gourmets Whoopie Pies

The Piping Gourmets Rolls Out GFCO Certified Gluten-Free Whoopie Pies

For the love of everything beautiful in this world, thank you for existing. So far, I've been able to try the first 3 flavors from the left. Let me tell you: they are amazing. If I had to choose between being rich and famous and having a lifetime supply of these, it would be a pretty tough toss-up. They come frozen, and personally, I think they taste best thawed, but they taste fine frozen too if you really cannot wait. If you're cooking dinner though, and you get one out to thaw while you're cooking, it'll be ready for dessert. These are so rich, and so yummy. It's very difficult to describe them with words. If you spoke whoopie pie, I'd get one out and roll it around on the keyboard so you'd know. . . These taste perfectly real, except for that they're so good, it's unreal. They don't have that I'm-an-allergen-free-version-of-a-delicious-food taste to them. I have no idea how to make something this delicious! I'm perfectly happy to buy them. I think this is love. Final verdict: Oh, kale yeah.

Alright, well I'm going to wrap this post up now, because I want to go eat another whoopie pie after talking about them so much. I hope these product reviews were helpful! If you have any products to suggest for review, leave a comment saying what I should try!

chocolatechocolatechocolatechocolatechocolatechocolatechocolatechocolatechocolatechocolatechocolatechocolatechocolatechocolatechocolatechocolatechocolatechocolatechocolatechocolatechocolatechocolatechocolatechocolatechocolatechocolatechocolatechocolatechocolatechocolatechocolatechocolatechocolatechocolate

Sunday, February 2, 2014

CTTVCC: Ants on a Blog


This delicious snack is one I've enjoyed since childhood. Eating this again brings back memories of my nana making these for me when I was knee high to a grasshopper. (Pardon the funny expression. I don't really ever use it but it makes me laugh because it makes me think of cute little old ladies in the South.) My nana always cut the celery smaller so that it was more kid-friendly. I used to get these when coming home from dance lessons. Ah. . . Memories.

The recipe calls for:

  • 2 stalks celery, cut into sticks
  • 1 box raisins
  • 4 tablespoons peanut butter
Here's what mine looked like:


The only thing I changed about this recipe was using dried cranberries instead of dried grapes. I mean, I did also use the sugar-free kind, just to be a little healthier, but whatever. For those who may have peanut allergies, or just want to try mixing this up a bit, you could use crunchy peanut butter instead of smooth, or any kind of nut or seed butter that you wanted. My favorite non-peanut butter is sunflower seed butter. Let me tell you, it is amazing. (I have also heard good things about pumpkin seed butter, but I haven't had the opportunity to try it yet. I might end up having to make some myself next fall after carving jack-o-lanterns.) Anyway, this is a super-simple, super-satisfying recipe that's great for snacking on without getting your hands that messy. Enjoy!

Monday, January 20, 2014

Sushi Salad

So, I'm a huge fan of sushi (vegan, obviously,) but I don't have one of those fancy sushi-roller-things, and getting sushi from a restaurant gets kind of pricey. It adds up pretty quickly if you get it on a regular basis. Now, I don't mind going out to a fancy sushi restaurant where I can get fancy things that I can't make for myself, or don't want to anyway, for special occasions or dates, but just your standard pre-made veggie sushi, I've kind of decided that it's not worth it. Now, recently, I've seen a lot of "deconstructed sushi bowl" and "sushi salad" recipes for and I decided to give it a go. Actually what happened was, I saw that my parents were cooking rice, and I was eating seaweed snacks, and I thought to myself: "Self, it would be so cool if I could eat some sushi." And then I thought, "But wait, it would taste the same whether it's all just a mess in a bowl, or if it is neatly arranged into little rounds. I will make a mess in a bowl." And so a mess in a bowl I made.


It was so delicious. But as I was saying, that was the messy version. I did make it look nicer first. But I'll post a picture of that later. I'm going to tell you how to make it. It's kind of up to you how you put it together.

What You Need:

  • cooked rice
  • seaweed snacks, torn into small pieces
  • chopped carrots, avocados, cucumbers, or whatever vegetables you like in sushi
  • soy sauce (gluten-free if you need)
  • gluten-free, vegan fish or tofu (If desired)
What To Do:
  • put everything into a bowl in the proportions you desire
I wish I'd had cucumbers, but I used avocado, chopped carrots, and gluten-free, vegan fish. obviously I used rice and seaweed, and my soy sauce was gluten-free. Here's what it looked like:


How pretty is that? I thought it was pretty. . . well. . . pretty. And you can put as much or as little of any ingredient as you want! So you can make it really easily. Personally, I didn't have to go to the store to buy any ingredients. I just used what I already had. So, I didn't have to spend any extra money. Also, it was incredibly satisfying, and I felt full, but not over-stuffed. It was a great balance, and I feel like it had a lot of good nutritional value. It doesn't take that much effort really, and you could honestly put even less effort than I did if you were just feeling extra lazy. No judgments. I hope you guys like this recipe as much as I did. I think if I was stranded on a desert island and I could only have one food, this would be in the running. For sure. Anyway, good luck! Enjoy!

Tuesday, October 8, 2013

Veggie Grab Bag

One of my local organic, small-business grocery/diners regularly has coupons for half off of a giant grab bag of in-season locally grown veggies. I got one and had a lot of fun cooking and eating them. What I did for most of the root vegetables was to make bakes (not fries) out of them. It's super-easy.

What you need:
  • Assortment of your favorite root vegetables (carrots, potatoes, rutabaga, beets, etc.)
  • olive oil
  • your favorite blend of spices (I recommend salt, pepper, Rosemary, cumin, red pepper, Italian seasoning.) ( Note: For veggies like sweet potatoes or beets, I like putting cinnamon, nutmeg, and sugar on then instead.)
  • large mixing bowl
  • baking sheet
What to do:
  • preheat oven to 350°
  • peel and chop your vegetables into small sticks or chips (depending on the natural shape of the vegetable.)
  • place the chopped veggies in the bowl and drizzle a sparing amount of olive oil on the vegetables. Toss or stir the vegetables until all are lightly coated in olive oil.
  • add your spices to the bowl, and toss or stir until all veggies until the spices are relatively evenly distributed.
  • place veggies on the baking sheet in a single later (you might have to bake in multiple batches.)
  • place baking sherry in oven and cook for approximately 10 minutes or until veggies begin to crisp.
  • allow veggies to cool enough that you won't burn your mouth of when you bite into them.
  • enjoy! 

Monday, August 19, 2013

CTTVCC: Vegan Mac 'N' Cheez

This recipe can be found on page 187. This is a pretty good recipe, though I admit I wound up making several adjustments to it. I've been searching for the perfect vegan macaroni and cheese recipe, and while I am still hoping to find or some up with one that tastes a little more authentic, this one isn't bad. In my opinion, it ended up tasting a little bit plain, so I'd pair it with some high-flavor sides.

The recipe calls for:

  • 1 (16 ounce) package elbow macaroni
  • 1/2 cup soy milk
  • 5 tablespoons nutritional yeast
  • 1/2 cup vegan margarine
  • salt, pepper, and garlic powder, to taste

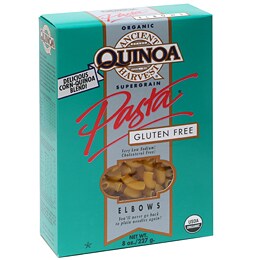
I used Ancient Harvest Quinoa macaroni, which is very yellow to begin with. Actually, I think that's where most of the color in the dish was coming from once I'd finished making the whole thing. I love quinoa pastas because they're higher in protein because quinoa is simply packed full of it. It's some of the best gluten-free pasta out there because many brands don't actually hold together very well, and just turn into mush. This, however, has rather good structural integrity.


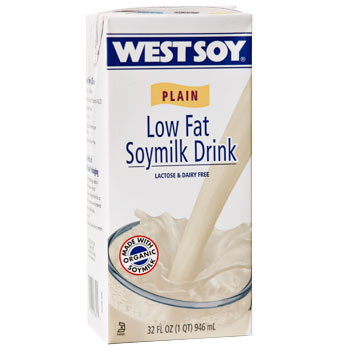
For soy milk, I used West Soy shelf stable soy milk. By the way, shelf stable alternative milks are simply a must. All too often, I've run out of fake milk when the store isn't open, and then my coffee, tea, cereal, recipes, etc. either don't turn out, or can't be made at all. Save yourself some drama. Keep a few cartons in your sock drawer.


I've finally switched to buying my nutritional yeast in bulk at my local health food stores. I still haven't found the exact sort of container I'd like to keep it in, but it'll probably end up going in a plastic-bag lined sealable canister of some sort.

For the margarine, I used Earth Balance Coconut Buttery Spread. This is some of my favorite butter replacements ever invented. Coconut is so good for you, an it has an extremely delicious taste. The only downside is that it remains rather firm, so you have to let it sit out for a while if you want to be able to really spread it smoothly.


Salt, pepper, and garlic powder were a random assortment of things from my parent's pantry. Like a mentioned at the beginning of this post, I added a few things in. I used red pepper in addition to the black pepper. I ended up having to use way more nutritional yeast because the sauce was too runny. I probably should have added more garlic powder, except for that I didn't want to have garlic breath when I was going to be hanging out with my boyfriend later. 

All in all, this is a decent recipe. It goes really well with veggies like sugar snap peas, corn, or broccoli. It also is delicious with extra-seasoned potato wedges or fries. I will probably try more macaroni recipes before I make this one again, but I can definitely see myself making this again. I suppose smaller kids might like this because younger children tend to prefer more bland foods than foods with a kick. If you did anything to this recipe to alter it, let me know in a comment, and tell me what you thought! I'm really excited to perfect vegan macaroni and cheese. 

Tuesday, August 13, 2013

Back to School

I'm taking a quick break from CTTVCC to address an upcoming issue many of us will be facing shortly, if not already.

So, one of the biggest problems going back to school for a vegan in pre-college levels or for college day students is what you can pack in your lunch. Well, never fear, I'm here to help you with that! Now, this is going to assume for the most part that you will have access to a microwave during your lunch hour. Sticking with the philosophy of The Vegan College Cookbook, I want to try and give you tips that are inexpensive, healthy (for the most part,) and delicious.

First, many of The Vegan College Cookbook's recipes work great for packing in a lunch. I have found that these recipes tend to generate a lot of leftovers. It's best to pack leftovers in a sealable microwaveable container if you intend to reheat the food. If it's something like a salad or something else that you don't have to heat, microwaveableness is then not necessary, but it never hurts.

Just a tip about salads though, if you're packing a black bean and corn salad or any other salad that has a lot of liquid, I would recommend draining it the night before you intend to eat it. It keeps it from getting quite as messy. If you don't want to waste the liquid, it makes a really great marinade for grilling tofu. Or if you don't have enough left for marinade, you can always add a little bit of another vegan sauce or dressing, and you can toss in a few herbs like rosemary, pepper, or whatever you like. Then you'll have plenty.

I must not overlook an obvious option. Fresh fruits make delicious sides for lunch. Bananas work very well, because they require practically no preparation. Citrus fruits like oranges, tangerines, clementines, or grapefruits are best pre-peeled and put into sealed containers. Peeling them in advance saves you time, and saves you a mess when you're trying to eat your lunch. Apples, pears, and other fruits with a core and stem can be eaten around the core, and thusly, do not require preparation, but again, if you want to save some mess, you can pre-cut them. If you do, I recommend dipping them in a bowl of lemon juice or orange juice immediately after cutting them, and before putting them into a sealed container. The same thing goes for peaches, plums, and other fruits with a pit. Berries and grapes require little preparation, so they work great as well. For grapes, I'd recommend taking them off the stem, and for strawberries, I'd say to cut the tops off, and dip them in a citrus juice before packing them into a sealed container that doesn't have a lot of extra space, so they won't roll around and get bruised. Melons, mango, or pineapple work best sliced into small chunks and packed into a sealed container with as little juice as possible.

On the other hand, many fresh veggies are also perfect for lunches. Some of my favorites are baby carrots, cherry tomatoes, and celery (chopped into smaller pieces,) stringless sugar snap peas, broccoli, cauliflower, cucumber slices, and sliced bell pepper. Some good choices of dips for those veggies would be peanut butter, almond butter, sunflower seed butter, cashew butter, hummus, or black bean dip. All of those options can be purchased in single-serving, doesn't-need-to-be-refrigerated packages, though buying them in traditional packaging is cheaper, and easier. I would avoid packing salad dressings to dip them in, because they are rather high in calories, with little redeeming nutritional value. Also, they're terribly messy.

There are many varieties of frozen meals that you can take from companies such as Amy's or Candle Cafe, but keeping them cold can be sort of a problem. Also, there's not always a good selection if you have to be gluten-free too.

Now,  an absolute must is shelf stable food. Why? Because I'm sure that you've forgotten to pack your lunch until the last second and grabbing a Clif Bar way too many times. Because I forget my lunch all the time, and I'm sure everyone else in the world does too. Whether you remember in enough time to grab something handy-dandy-healthy, or you stash a collection in your locker for those occasions like I do, not having to keep all your food cold can be a great thing. Here are some of my favorites:


As a side note, not all GoPicnics are vegan, and there are some vegan ones that aren't gluten-free. But, they're on sale this week at Target, so stock up if you have the chance. Now then, I hope that you found everything super-helpful. If you'd like to share some of your lunch favorites with me, I would absolutely LOVE to hear them. I mean seriously. I like variety, and trying new things. So, enlighten me. 

Tuesday, June 18, 2013

CTTVCC: Georgia Peach Cobbler

I apologize in advance for the unexpected, and thus, unannounced hiatus from my blog. There has recently been a series of unfortunate events in my life. . . More like tragedies actually. A girl who used to go to my school was murdered by her boyfriend, one of my cats passed away of old age, (Rest in peace, Arwen.) and my grandmother has been in and out of the hospital. I've been rather busy. But enough sad stories, let's get to talking about yummy food!

This scrumptious, and not-completely-bad-for-you dessert is located on page 295. This is a great comfort food, especially for those times when you have already eaten a whole pan of brownies, and you still need some comforting. This fruity goodness just wants to give your tummy a hug. I don't know about you, but I crave chocolate during the winter, but during the summer, I tend to want fruity desserts. Perhaps that's because subconsciously, I know that summer is the season of fruit, and that's why I want it more then. Anyway, this is something you should try next time you're feeling down. This relatively healthy, light, fruity dessert will make your tummy (and hopefully you,) happier in no time!

The recipe calls for:

  • 1 (15 ounce) can peaches with syrup
  • 1/4 cup quick oats
  • 1/4 cup corn flakes or granola
  • 1/2 teaspoon cinnamon
  • 1 tablespoon brown sugar
I used generic peaches but I made sure to get the kind that's in light syrup. This recipe would probably still work even if you got peaches "in their own juice" if you want to be extra-healthy. 

I used generic quick oats, cinnamon and brown sugar. Because I love cinnamon, I used a whole teaspoon of it. Cinnamon is great for you though, so I don't care if it's not exactly following the recipe. Speaking of not following the recipe exactly, I kind of went a little crazy with the oatmeal and granola layers, and ended up using twice the amount of the mixture then it called for. Oh well.

Here is my finished cobbler:


As you can see, the fruit to oats ratio is way off. It was still delicious. This is one of the simplest dessert recipes that I've ever made, and it's extremely satisfying. If I hadn't already decided not to remake recipes for myself until I'd gone through that recipe's whole section in the cookbook, I think I would end up making this 50 times before I finished everything else in desserts. I also would totally eat this for breakfast as well because it's got fruit, granola and oatmeal. That makes it breakfast food too, right? Well, anyway, I hope you enjoy this recipe just like I did!

Monday, June 17, 2013

CTTVCC: Piz-Tato

This recipe is on page 284. Starting out with this recipe, I wasn't sure what to expect. I stopped really liking potatoes a while ago, but now I'm starting to think that's just because I got sick of the way my family always fixed potatoes, which was full of butter and cream cheese, and cheese, basically, just dairy overload, which was also rather bland. This recipe has renewed my faith in potatoes. Not only was it good, it was really delicious, especially since I was expecting not to be impressed. I absolutely loved it. Next time I want vegan, gluten-free pizza, I won't bother whining about finding one of the holy grails of gluten-free, vegan frozen-in-a-box-from-the-grocery-store pizzas because making the gluten-free dough is normally more work than I want to do anyway. I'll just flip to this recipe.

The recipe calls for:

  • 1 large baking potato
  • 3 tablespoons pizza or tomato sauce
  • 1/2 cup shredded mozzarella-style vegan cheese

As I mentioned earlier, I wasn't expecting this to appeal to me very much, so, consequently, I did not get a large baking potato, I got a small potato. Because I got a baby-sized potato, I cut the rest of the ingredients in half. I definitely won't be cutting the recipe in half in the future, because this was so yummy!

I used store brand, garden-style pasta sauce, and Daiya Mozzarella- Style Shreds. Those two ingredients are a match made in heaven. Or perhaps made in America. . . but inspired by Italy! 

Here is my finished potato:


How adorable is that? They're like baby-pizzas!


Yeah, I wasn't sure how to eat them. Do you pick them up and eat them like pizza? Do you cut them into bite-sized pieces? I gave up guessing and mashed it all together. So, now it doesn't look that attractive, but it tasted amazing!

I really loved this recipe. I will definitely be making it again. I with there had been more of it. Oh well. At least I'm more open to the other potato recipes in the cookbook. I know I wouldn't have come up with this recipe on my own. turn a potato into a pizza? How often do people do that? Well I've decided: not often enough. Let me know what you thought by commenting on this post!

Sunday, June 16, 2013

CTTVCC: Bunny Butter Spread

Page 77 is where you'll find a little white rabbit who is terribly late for an important date, and decides he needs to snag this snack before rushing off to meet the Queen of Hearts. Okay, not really, but it is where you'll find the recipe for Bunny Butter Spread. This spread makes a delicious snack that I could eat forever. I'm glad this makes a limited amount.

The recipe calls for:

  • 1/4 cup grated carrots from the salad bar
  • 2 tablespoons chunky peanut butter
  • 1 tablespoon raisins
  • 1 tablespoon orange juice

I grated carrots from the produce section of the grocery store, because as school is out, I have no salad bars at my disposal. 

I used Jif Extra Crunchy Peanut Butter


Alright. It's confession time. I hate raisins. I tolerate them in my gluten-free cinnamon raisin bread, but I don't go out of my way to put them in food. However, I love craisins (dried cranberries.) I used  Ocean Spray Original Craisins instead of raisins, and you know what? It tasted way better that way. I think the craisins added a much better pop of flavor than boring old raisins ever could. 


Then I used store-brand orange juice. Hurray. Cheap.

Here is my finished spread:


The recipe suggested eating the spread on crackers. I haven't bought any gluten-free, vegan crackers lately, so I ate this with little tortilla rounds. They were perfectly bite-sized, and the slight amount of salt on the chips added a nice flavor to the spread. I will definitely be making this for future parties. If you're going to make this for a party, I suggest doubling or tripling the recipe, or maybe even quadrupling? It's really good, and you'll have to watch it to make sure that the one friend that everyone has who only comes to parties to eat all your food doesn't hog the whole thing. It's such a delicious recipe, I really don't blame the kid for wanting to eat it all. I know I probably could. I hope you all loved this! If you've tried the recipe with raisins and craisins, I'm curious to know which you liked better! Leave me a comment, and tell me about yours!

Saturday, June 15, 2013

CTTVCC: Pantry Raid Pasta

This recipe is on page 163. This recipe is phenomenally delicious. It tasted like I had put a bunch of effort into it when really, you just throw it together. This honestly tastes better than some restaurant Italian food I've had, and it's ready so much faster, and costs so much less. Even my non-vegan family members fell in love with this. I foresee making this a lot in the future.

The recipe calls for:
  • 1 (16-ounce) box elbow pasta
  • 1 (15-ounce) can diced tomatoes
  • 2 (8-ounce) bags vegan chicken strips
  • Salt and pepper, to taste

Okay, so I didn't use elbow pasta. But isn't that the point of the pantry raid? I had gotten a sampler box of a bunch of random gluten-free foods from Vitacost, and the company had sent a gluten-free penne the month that I bought it. The package was, most appropriately, almost completely in Italian, but lucky for me, there was also a French section, and I was able to figure out that the only ingredient in the pasta was corn. It was all just made of corn. I found it a little hard to believe, but I figured that I wouldn't die from it. After I cooked it, I realized that it probably was entirely made of corn because it lost all structural integrity, and basically shredded itself, so obviously it didn't  have a very effective binding agent. It tasted great though!

I used generic diced tomatoes, but I used ones with Italian seasonings mixed in with the tomatoes. I would definitely recommend using  tomatoes with Italian seasonings because you don't want your pasta to taste bland.

For the faux chicken, I used a mix of Beyond Meat Grilled Strips and Beyond Meat Lightly Seasoned Strips, just to mix things up a bit. Actually, I just didn't have enough of the lightly seasoned strips to make the recipe, so I opened the other package to augment it.

I tried not to use too much salt, but I was very generous with the pepper. I am a firm believer that pepper helps enhance the flavor. Also, I've heard that eating spicy foods boosts your metabolism. Maybe it'll counteract some of those pasta-carbs. 

Here is my finished dish:


Mmmmmm. That stuff was crazy-good. Can you see all that shredded pasta? Even though it's molecular integrity was compromised, it still tasted amazing! I just can't get over how delicious this was. If I wasn't trying to cook through the whole cookbook, I'd probably stop and just make this over and over for at least a week. It's that good people, it's that good. Let me know how yours turned out, and if you liked it as much as I did by leaving me a comment below. Comments are always welcome!

Friday, June 14, 2013

CTTVCC: Dirty Chick (Pea) Clean-Up Salad

Turn to page 115, please. This is a really delicious recipe that I know for sure I would not have thought of myself. It's a combination that I wouldn't have come up with, but yet, compliments each other very well. It's savory and sweet; soft and crunchy at the same time. It's a simple recipe that I know I will turn to in times of need, or need for something to pack as a lunch on those days when I don't feel like trusting the cafeteria.

The recipe calls for:

  • 1 (15.5 ounce) can chickpeas, drained and rinsed
  • 1/4 cup diced celery
  • 1 Red Delicious or Gala apple, cored and diced
  • Salt, to taste

I used store brand chickpeas, and fresh celery, and a Gala apple. My favorite kind of apple (right now anyway,) is the Pink Lady apple, which I will use next time I make this salad. It would also be interesting to try using a Granny Smith apple for a more sour taste. Basically, it doesn't matter what kind of apple you use. The kind of apple will, obviously, slightly change the taste of the salad though. I would love to hear what kinds of apples you've used, and how you thought it tasted! Just leave a comment on this blog entry to let me know.

Also, I love celery. All the sources I've come across say that your body burns more calories to digest celery than the celery contains. Essentially, celery is negative calories. Figured I'd throw that out there, just in case you didn't know.

I only used a small pinch of sea salt, because I knew the chickpeas would taste great salted, but I wasn't sure about the apples.

Here is my finished salad:


This salad is really easy and fast to make. It doesn't require any baking, it doesn't really matter if your proportions are slightly off, you can eat as much or as little as you like at a time without wasting, or having half eaten sandwiches or whatever littering your fridge. It's packed with protein and fiber as well as good flavor. It makes a great snack or main course, and every bite is delicious. I hope you love this!

Thursday, June 13, 2013

CTTVCC: Black Bean and Corn Salad (Salsa Remix)

Hello to all my charming readers, this recipe is on page 113. This recipe is great. It's versatile as it can be eaten on chips, in a taco or wrap, by itself, on a bed of lettuce, or even upside down. Though, I wouldn't recommend the latter. I really liked the taste of this. I think that the beans and the corn compliment each other so well. While the Black Bean and Corn Salad (Extended Dance Mix) is a delicious zing of flavors, sometimes less is more. I guess it depends on the person, or maybe more specifically, on said person's mood. This is another good recipe for parties, by the way, and I wouldn't plan on having leftovers.

The recipe calls for:
  • 1 (15 ounce) can black beans, drained and rinsed
  • 1 (8.75 ounce) can corn, drained
  • 6 tablespoons lime juice (fresh or from a squirt bottle)
  • 5 teaspoons olive oil
  • 1 tablespoon chives
  • 1/2 cup salsa
  • salt and pepper to taste
I used Earth Fare brand beans, corn, olive oil, salsa, salt, and pepper. I didn't use lime juice, because I didn't have any, but I had a bunch of lemon juice, and I figured that it's probably close enough in taste. I used Real Lemon brand lemon juice, though, I'm sure fresh lemon juice would taste better. Admittedly, fresh lime juice would taste even better than that, but hey.

By the way, I would recommend using a medium salsa at the mildest. This is the sort of thing that tastes best with a bit of a kick. I only had mild salsa in the fridge, and I didn't want to open another jar, so I just used cayenne pepper instead of black pepper. It did the trick. Of course, it makes it spicier the longer you're eating it, but hey, it helps counteract the law of diminishing return, since each bite has flavor that doesn't just start getting dull after a while. Of course, if you combined cayenne pepper with hot salsa, you might be able to make some cash by selling the drinks at your party, or perhaps use the opportunity to force people into trying your favorite fake milk? Just kidding. Don't do that. It's not a good way to make friends.

Here is the evidence of my food DJ skills:


The olive oil makes this look especially shiny. It's just saying "Eat Me!"

Perhaps this would be a good recipe for trying to determine which brand or tortilla chips actually taste the closest to Mexican restaurants. I mean, a bunch of them claim to, but which ones are telling the truth? This is a great excuse for playing chip-detective. Or if you melt some of your favorite vegan cheese in a taco shell or soft tortilla, this makes a great entree. You can pull this out when you want an unboring snack, especially when you get early-hour-of-the-morning-munchies when you're trying to finish up a project last minute. That sort of situation would be the perfect time for you to use the spiciest combination possible, you know, to wake yourself up. Don't get me wrong, I love my coffee, but sometimes, your body just grows immune to the effects of caffeine. I would definitely try this recipe out, because let me tell you, even if you make it as mild as possible, it's still delicious!