Saturday, June 1, 2013

CTTVCC: Hearty Hummus Sandwich

Hi Everyone, and welcome to another entry in CTTVCC! Today's recipe is on page 50. This is a delicious, and simple, yet filling sandwich. I happen to really like hummus sandwiches, especially since my school's sandwich shop offers hummus as a protein on their "create your own" sandwich menu. Hummus is also incredibly good on veggie burgers. Then you have awesomely protein-packed deliciouswhiches. All that to say, hummus is really good on sandwiches.

The recipe calls for:
  • Hummus, to taste
  • 2 slices thick-crusted sourdough bread
  • 1-2 leaves lettuce
  • 3-4 cherry tomatoes, halved
I used Publix original hummus, but I would recommend Sabra Tuscan Herb Garden Hummus, which is the favorite of pretty much everyone in my family. It's got a lot of flavor to it, which would help make sure your sandwich isn't boring.


I used Food For Life Brown Rice Bread, because obviously, I can't eat regular sourdough bread. 


I used generic lettuce and these cute little yellow grape tomatoes. I figured that yellow tomatoes are less common, and thus more exotic. I think they're also a little sweeter than regular cherry tomatoes.

Here is my finished sandwich:


Overall, I think this is pretty good. It's a little simplistic, but that's not always a bad thing. Perhaps if you swapped the lettuce for spinach. Then you could pack in a bit of extra iron. That sounds really good actually. I want to go make that now. I also kind of wish that I'd used some cherry tomatoes too though. I could have made a little pattern with the yellow and red tomato halves. That would be cute! This is a pretty low-effort recipe, and obviously, it's not something to make when you're pretending to be fancy, but it's pretty balanced for when you need a quick bite to eat, I think. If you're absolutely famished, you'll probably want a bit more to eat than just this sandwich, though. Also, these can get a bit messy if you put too much hummus on them. But, as long as no one's watching, the mess is worth it!

Friday, May 31, 2013

CTTVCC: Rent's Due "Cheezy" Ramen

If you turn to page 133 of TVCC, you will find this super-simple, easy "cheezy" recipe. This is delicious, and super-simple. I can't believe I'd never thought of putting nutritional yeast in noodles before. I mean, you already have to add a package of powder-flavoring, so why not just add some extra powdered nutritional yeast? Easy. Plus, it actually gives your ramen some protein and vitamins so you aren't just eating carbs with water.

The recipe calls for:
  • 1 package ramen (try Top Ramen Oriental flavor)
  • 2 tablespoons nutritional yeast
The only vegan, gluten-free "ramen" I've been able to find is Dr. McDougall's Pad Thai Noodle Soup because Pad Thai uses rice noodles. If you have been able to find other gluten-free noodles, please, comment and let me know.


I accidentally grabbed Dr. McDougall's Pad Thai Noodle, which isn't a soup. It doesn't use as much water, so it leaves a sauce instead of a broth. So, I just used extra water to make it more soupy. This stuff comes with little tofu cubes that are reconstituted when you cook them in the water, so that your food isn't totally boring.


I used Red Star nutritional yeast. I'm actually starting to kind of run low on the stuff. I'm thinking about trying a different brand, or perhaps buying it in bulk to see if they all taste the same.

Here is what my soup looked like:


When I made this, I only had the cup-sized noodle packages, which is one serving, and the full-sized packages are 2 servings, so I just cut the nutritional yeast in half. Pad Thai has a lot of it's own flavor, but it didn't clash with the nutritional yeast flavor. I think the nutritional yeast actually helped enhance the flavor. I've pretty much decided that unless I'm making a different Vegan College Cookbook recipe, I'm always going to put nutritional yeast in my noodles. I would definitely recommend this recipe is you're wanting to make noodles. It was rather tasty. If you made your soup with a different flavor, let me know how it turned out! I'm really curious to try other favors, (especially the flavor that the book recommends,) but obviously, if it's not gluten-free too, I can't eat it. I hope you guys were as impressed as I was!

Thursday, May 30, 2013

CTTVCC: Booty Shakin' Bagel

Today's recipe is located on page 41. This is a rather tasty recipe, and great for when you don't have much time, but want to eat something filling. It's very customizable and simple, yet not too simple. (I mean, you do have to actually do something. The recipe doesn't just say "open a vegan pop-tart package and eat it.")

The recipe calls for:
  • 2 tablespoons vegan cream cheese
  • 2 tablespoons jelly (your fave flavor)
  • 1 bagel, sliced in half

I used Tofutti Better Than Cream Cheese, which is the brand most available to me, though, I'm sure other brands would work just as well, as long as you like the flavor.

For the jelly, I used Polaner Sugar-Free Blackberry Jelly with fiber.


Now, when it comes to the bagel, I could not fin gluten-free, vegan bagels for the life of me. I looked in all the grocery stores I could find, and got nothing. So, I decided that a gluten-free, vegan English muffin would work well too. I picked Food for Life Brown Rice English muffins, and toasted one. They have just the right amount of crisp to the outside, and they're deliciously soft on the inside.


So here is my finished not-bagel:


Because I had to switch out the bagel for an English muffin, I paired this recipe with a nice warm cup of English breakfast tea soy latte, and felt thoroughly like an American person wishing to feel like a British person. Really though, the combination is very good. The simple fruit-and-(vegan)-cream-cheese-on-(gluten-free)-bread taste went very well with mellow, sweet taste of the tea latte. The recipe is one I will definitely make again.

Wednesday, May 29, 2013

CTTVCC: Black Bean and Corn Salad (Extended Dance Mix)

This recipe is located on page 112 of TVCC. This version of the black bean and corn salad is really flavorful and tangy. I mean like, exploding with flavor, which is great for a recipe that is so easy to make. (No actual cooking required.) I liked it a lot, even though I'm not a big fan of vinegar. I would definitely recommend this for parties, since one batch makes a whole lot. (My mother actually asked me to make this for her next office party. Win!) This is also a great recipe to make and keep the leftovers in the fridge for a day when you're too lazy to make dinner. This salad is very versatile because you can eat it by itself, with corn chips, or in a taco shell. It makes a great side dish, snack, or entree. You can eat it cold, or hot. You could really do anything with it. I mean, this would even be good mixed in with mashed potatoes, for crying out loud.

The recipe calls for:
  • 1/4 cup balsamic vinegar
  • 2 tablespoons vegetable oil
  • 1/2 teaspoon salt
  • 1/2 teaspoon pepper
  • 1 (15 ounce) can black beans, drained and rinsed
  • 1 (8.75 ounce) can corn, drained
  • 1 (15 ounce) can diced tomatoes with chiles
  • 1 teaspoon chives
  • hot sauce, to taste

I used Newman's Own Balsamic Vinegar, and everything else was Earth Fare brand.


I actually used olive oil instead of vegetable oil, but I figured that olives are vegetables, and seeing as olive oil is regarded as a healthier oil, and the fact that I like the taste of olive oil much more than the taste of regular vegetable oil, and the fact that we didn't even have regular vegetable oil in the house, I think it's a much better alternative.

I couldn't find diced tomatoes with chiles, so I just used petite diced tomatoes. I don't think I really missed out on spiciness though, because I used red pepper instead of black pepper, because our black pepper was in a grinder, and the red pepper was pre-ground, and much easier to measure. That's also why I didn't bother using hot sauce.

Here is my finished food:


I had actually cut the recipe in half, an it was still a lot of food. Enough for 2 people actually. I did, in fact, stuff some of this into a crunchy taco shell, (trying to avoid as much of the liquid as possible,) and I also ate some with tortilla chips. Warning: This gets spicier the longer you eat it. I think that might have something to do with the red pepper I used, but hey. It wasn't a bad spicy. Who likes boring food anyway? It's nothing a cup of soy milk can't fix. So, my overall review: this stuff is really delicious, really versatile, really easy, really impressive, and really cheap. It really (I've been using that word a lot, huh?) lives up to the purpose of the cookbook. I would definitely make this again. (And I plan to. I might even throw a party just as an excuse to make all my friends try this recipe!) I hope you all loved this recipe just as much as I did! Let me know what you thought in the comments.


Tuesday, May 28, 2013

CTTVCC: Fake Blondes

The natural habitat of this phenomenal recipe is page 294 of TVCC. How many girls wouldn't kill for instant brownies? Guys, I'm sure you can win the heart of any girl with these babies. Girls, I'm betting this recipe will be going on your list of favorites. This is pretty much as close as I've ever seen anyone come to successful instant brownies. Not to mention vegan, gluten-free (I'm my case anyway) brownies. These were a delicious, satisfying, easy, don't-have-to-have-much-patience, rich, relatively not bad for you, amazing chocolate fix. They were good enough to eat the entire batch, yet rich enough to be perfectly satisfied with one serving. When has that ever happened before? How about NEVER.

The recipe calls for:
  • 1/2 cup applesauce
  • 2/3 cup sugar
  • 1/4 cup canola oil
  • 1 teaspoon vanilla extract
  • 1 cup whole-wheat flour
  • 4 tablespoons cocoa powder
  • 1/2 teaspoon salt
  • 1/2 cup vegan chocolate chips

I used Earth Fare brand sugar, salt, vanilla extract, and Earth Fare brand sugar-free applesauce. I would advise trying to find applesauce without high fructose corn syrup. A lot of name brand apple sauce sneaks that in there and it makes your food not as good for you. Just a tip, I have found that when you use applesauce as an ingredient in baking, your food won't stick to the sides of the container you bake them in. In fact, there's always a bit of a gap between the edge, and the baked item. My super-scientific guess is that the water in the applesauce mostly evaporates, and when it does so, the food slightly shrinks, pulling it away from the edge of the pan/bowl/whatever. It makes sense to me, but hey, I'm not a chemist . . or a professional chef.

My mother absolutely detests canola oil, so I didn't have any around the house. Instead I used Earth Fare brand extra-virgin olive oil. I was a bit nervous when I was putting the mixed batter in the microwave because I could still smell the olive oil a bit, but once they were completely cooked, I couldn't smell it or taste it.

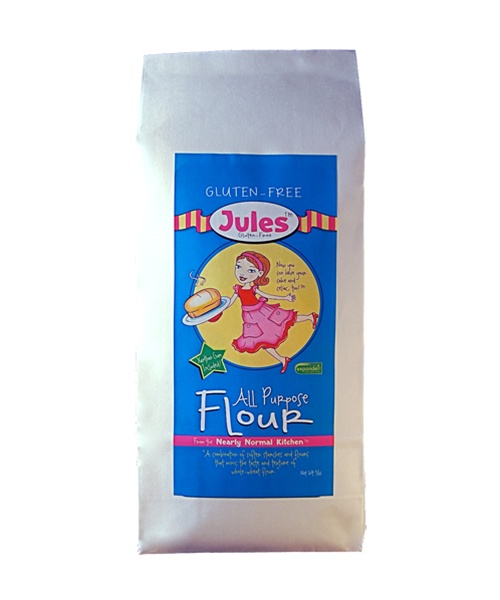
Since I'm gluten-free, I obviously didn't use whole wheat flour. I used Jules all-purpose gluten-free flour. I think the gluten-free flour made my fake blondes a bit chewier than normal brownies, so anyone who used normal flour (you non-gluten-free humans out there,) please let me know how the consistency turned out. I am super-curious, but obviously, I can't try it out myself.


For the coca powder, I used Hershey's Special Dark cocoa powder because I LOVE dark chocolate. I'm sure non-dark chocolate works great too though.

HERSHEY'S Cocoa SPECIAL DARK

Lastly, I used Enjoy Life semi-sweet mini chocolate chips, and I cannot tell a lie, I didn't measure them. I had a mostly used up bag of them, and I figured there was at least half a cup, and that if my brownies had extra chocolate, then Vive La Chocolat! (Pardon my french.)

Share


Here is my delicious finished product:


This is actually the surface of the moon. They lied. It's not made of cheese. It's made of Fake Blondes. Just kidding. But seriously, the moon would be a lot cooler if it was made of this and not fancy rocks.


Ahhhhh! Don't you just want to bite your screen? Mmmmmmmmm. Mmmmmmmmake these now. They're so yummy.

One thing I must say is that they weren't very blonde. Perhaps they have gone back to their natural color? Haha! I was expecting blondies though, because of the name, but these were definitely brownies. Or maybe that's why they're "fake" blondes. . . because they're really brunettes? Eh. . . I don't know. I do want to make blondies with this recipe now though. (As soon as I'm done not sharing the other 3 servings of these things.) By the way, these taste best when they're at least warm, if not hot, with a side of your favorite vegan vanilla ice cream.

P.S. I like your natural hair color best!

Monday, May 27, 2013

CTTVCC: No-Need-To-Visit-A-Diner-For-Hash-Browns Casserole

This recipe is available on page 42. I apologize for posting this recipe review so late in the day, (I've been helping my older sister move,) and I apologize in advance for only having one picture of my finished product. it smelled too delicious to wait for more than one picture to dig in. While I don't normally consider broccoli a breakfast food, this breakfast casserole was pretty good. I guess I would think of it more as brunch, which is exactly what I made it for. Who needs to wake up before noon anyway? I cut the recipe in half just because I was only intending to make it for one person (me,) with maybe one or two sample-filchers. It didn't say exactly what size of a container to cook it in, so I used a glass bread pan and had plenty of room for more. I'm not positive that it would hold the entire recipe, but I'm sure it would at least come close.

The recipe calls for:
  • 1/2 cup nutritional yeast
  • 1/2 cup soy milk
  • 1 teaspoon garlic powder
  • Salt and pepper, to taste
  • Olive oil, for coating
  • 1 (20 ounce) bag shredded potatoes (can also use hash-brown-style potatoes), thawed
  • 1 (12 ounce) bag veggie veggie burger crumbles, thawed
  • 1 (10 ounce) bag frozen broccoli florets, thawed
  • Hot sauce (optional)
I used Red Star Nutritional Yeast again. I don't know why, but I like nutritional yeast in recipes, even though I'm not particularly fond of the smell of it when it's dry in the container. (My sisters complain about it every time I use the stuff.) Really though, it never ceases to amaze me that you can make it taste so much like cheese. What is this wizardry?

Instead of using soy milk, I used Unsweetened Flax Milk which is a great source of Omega-3s without fish oil. (Blech!) I don't recommend substituting flax milk in everything, but for most recipes or cereal it's great. It just tastes kinda gross in coffee or tea. The main reason I like using this stuff is because it's only 25 calories for an 8 oz serving. (The sweetened version is still only 50 calories.) It's just an easy way to keep the food slightly healthier without sacrificing flavor.


 I used generic olive oil, garlic powder, salt, pepper, and broccoli florets.

 It took me forever to find ANY hash-brown style potatoes, but I think I was just not looking in the right place. I did finally find these Alexia Hashed Browns and they worked fabulously. I don't know why Alexia has past-tense hashed browns instead of present-tense hash browns like everyone else, but whatever. Maybe they wanted more letters on their packaging.


For the veggie burger crumbles, I used Marjon Original Tofu Crumbles. I found them one day at Publix grocery store, and as soon as I realized they are gluten-free and vegan, I instantly made them a staple in my refrigerator.

I didn't use any hot sauce, just because I've never been a huge fan of the stuff. I might have tried it if we'd had hot sauce lying around the house. However, we didn't, and I didn't want to be responsible for eating all of it if I had bought a new bottle.

This is my finished casserole:


Overall, this recipe is pretty good. It took a little bit longer to fix than other recipes I've made so far, but I think that might have just been that I had to actually measure things because I cut the recipe in half. I found it very satisfying and filling. I would definitely make this recipe again, and I think my cats hope I do too. This is the sort of food that tends to make you accidentally drop crumbs, and my kittens seemed to think this was just the greatest stuff ever. Though, admittedly, they aren't that discriminant when it comes to food. Whatever. This was yummy! I honestly wish I had made more of it so I could have pigged out. I hope you all liked it too!

Sunday, May 26, 2013

CTTVCC: O Baby

The recipe for today is on page 86 of TVCC. (I feel all fancy having my own abbreviation for this!) The only thing that could make this recipe better would be if you didn't have to let it cool in the fridge before eating it. I mean really, microwaves heat stuff practically instantly. Why don't we have instant cooling devices? Come on, science! Anyway, I think this recipe would work great for parties. It would also work well for hanging out with just one friend. (Especially if it's a over-nighter, particularly the kind where you don't sleep.) This could be a dessert or a snack. It's in the Spotlight on Peanut Butter section, so it doesn't really say what classification of food it's supposed to be. Heck, eat it for breakfast. Most of the ingredients are breakfast foods anyway.

The recipe calls for:
  • 3 1/2 cups O-shaped vegan cereal 
  • Handful vegan chocolate chips
  • 1/2 cup maple syrup
  • 1/2 cup peanut butter
I used Nature's Path Organic Whole O's Cereal, which is gluten-free and vegan. I understand that there are vegan O-shaped cereals out there that are not gluten-free for those of you who can eat wheat. (Watch out for the Vitamin D3 though. Apparently some brands use animal-derived D3.)

I really love Enjoy Life Mini Chocolate Chips which are gluten-free, soy-free, and vegan. This brand also makes chocolate chunks that would probably work fabulously in this recipe as well. Those of you with big hands are lucky, because my handfulls are smaller than most people's. That is why I ended up putting a few extra in my O Babies.

Here it is with the ingredients so far:


I used generic maple syrup (which was still vegan) because that's what my family had in the pantry. Feel free to use the fancy stuff in your recipe if you'd like.

One thing I must say about the peanut butter for this recipe is: Use creamy if you can help it. I used crunchy which has less actual peanut butter in it because of the peanut chunks. If you use crunchy peanut butter, use a bit extra so that there is enough peanut butter to coat all the other ingredients.

Here is how it turned out:


 It was hard to get a square (or rectangle, rather,) that didn't fall apart because of the crunchy peanut butter not having enough actual peanut butter to it, but here is one little piece I managed to snag:


My little sister oh-so-helpfully ate over half of these when I wasn't looking. Oh well. At least she's eating vegan food when she eats my food. I'm sure it's better for me that she stole my dessert. Oh well. Obviously though, this stuff is really good. It's so tempting to make more of them right now, but I've got other desserts in the cookbook to make first. This is definitely going on my list of go-to recipes. Were you as impressed with these as I was?

Saturday, May 25, 2013

CTTVCC: The Morning-After Scramble

This absolutely nomalicious recipe can be found on page 34. This was phenomenal. Amazing. Absolutely delicious. So so SO SOOOOOO GOOOOOD! Well, you know my opinion now. It is a wonderful recipe. For a while there, I was looking for the perfect tofu scramble recipe, and I could have saved myself a lot of time if I'd just looked at this one. This is supposed to be a breakfast recipe, and I agree. It works great for breakfast! It also would work great for lunch, dinner, or a snack. It's just scrumptious.

The recipe calls for:
  • 8 oz salsa
  • 1 (16-ounce) package extra-firm tofu, mashed
  • Salt, pepper, and garlic powder, to taste
  • 1/3 cup soy milk
  • 1/4 cup nutritional yeast
I used generic salsa because that's what my family had, but there was only mild salsa in the refrigerator, and I'm a fan of medium salsa at the minimum, so I supplemented the spice with a dash of cayenne (red) pepper.

 For the tofu, I used Nasoya Extra Firm Tofu, though, you could just as easily use Nasoya Lite Firm Tofu, (which I normally use,) that is only half the calories or the extra firm.  It just strikes me as funny that there is a "diet" version of tofu, which is normally considered a diet food in and of itself.

Extra Firm Tofu


I used Organic Unsweetened Silk Soymilk, because the sweetened soy milk, even original flavor, always tastes weird to me in more savory recipes. If you want to use regular stuff though, knock yourself out. And hey, while you're at it, you could use any fake milk you wanted to! It seems like you can really never run out of options there.

Organic Unsweetened Soymilk

For the Nutritional Yeast, I used Red Star brand nutritional yeast. (However, on their website, I can't find it listed in the products. But it's in my grocery store! I saw it there today when I was picking up more CTTVCC supplies!)

Here is what the tofu scramble looks like after cooking:


Don't mind the plate I hand-decorated in elementary school, but this is what it looks like on delicious toast :


Now then, this is a recipe that you either want to make for a lot of people, or only make part of it. I personally cut the recipe by a third, and I still had enough to load up 3 pieces of toast with it. This would also work as a breakfast burrito, you could eat it on tortilla chips, pita pockets, (The recipe says with potatoes or faux meat of some kind,) or just by itself. My mother tried some before she went to work, and she said it was so delicious, that she couldn't stop thinking about it all day at work. For real guys, this stuff is crazy-good.

Friday, May 24, 2013

CTTVCC: Lazy Person's Grilled Cheese

Hello again, and welcome back to my cook-through of Peta's Vegan College Cookbook. The recipe I am reviewing can be found on page 63. Even though this is a super-simple recipe, I don't think I would have come up with it on my own. Why? Because I don't think I would have thought to put pickles on a grilled cheese sandwich. And by grilled I mean microwaved. And by cheese I mean vegan cheese. Obviously.

The recipe calls for:
  • 2 slices vegan cheese
  • 2 slices of bread, toasted
  • pickle slices (optional)
I used pre-sliced Daiya cheddar style vegan cheese, which fit perfectly on the Amy's Gluten Free Sandwich Rounds, which I used instead of regular bread. Like seriously. They were the exact same size. Match made in heaven. However, when I first made the sandwich, I thought to myself: "Self, do you really need two slices of cheese? After all, there won't be any corners of bread showing, which is the real reason people use two slides of cheese, right?" Wrong. I took one bite, and I was like, "Nope! Needs more cheese!" Lucky for me that wasn't a hard problem to fix. (But once I had two pieces of cheese on the sandwich, it wasn't really pretty, so I didn't retake the picture. Not that it was THAT pretty to begin with, because the cheese melted all over everything. I figure it's more authentic that way, because college students make messes in their kitchenettes all the time, right?)

When I got to the pickles, I realized I was out of pickle chips. I went to Whole Foods, and they were totally out of dill pickle chips! There were no dill chips in any of the brands they carry. So, I bought whole dill pickles, and sliced up one of the pickles into chips when I got home. (First world pains, I know.) The recipe says the pickles are optional, but I am declaring them definitely NOT optional. If you haven't tried this combo, you haven't lived. Well actually, I hadn't tried it, and I was alive, so let me make that: if you haven't tries this combo, your life is incomplete.


This was an absolutely AMAZING sandwich. I made one for my youngest sister, and she is so hooked. I think she's eaten like 20. (Okay, maybe I'm exaggerating a little bit.) BUT STILL! I think I could survive off of these for a while if I had to. Really. I could. I cannot believe I've never thought to put pickles on a grilled cheese sandwich before though! This cookbook is genius. Has anyone else out there ever thought of pickles on a (vegan) cheese sandwich before?

Thursday, May 23, 2013

CTTVCC: Thai Takeout (Hold the Takeout)

I apologize in advance for posting today's review so late in the day. Today's recipe is on page 78 of TVCC. This recipe was pretty tasty, though, I think you need a veggie like (frozen) broccoli or something to go with it. It was also a bit unclear with the amount of rice you need because it doesn't specify if the amount of rice measured should be cooked or uncooked. If it's supposed to be measured before cooking, I would recommend cutting the recipe in half unless you're sharing. I think it would probably work better with a cup of cooked rice, unless you were going to make a bit more of the sauce.

The recipe calls for:
  • 1 cup rice
  • 2 tablespoons peanut butter
  • 1 teaspoon soy sauce
For the rice, I used Della Basmati Brown Rice. I measured a cup of uncooked rice when I made mine.


I used PB2 powdered peanut butter because it has fewer calories and significantly less fat than normal peanut butter. All you have to do is add water to the powder to use it just like regular peanut butter.


Instead of regular soy sauce, which has gluten in it, (Why? I have no idea.) I used Bragg Liquid Aminos soy sauce. It's gluten-free and is supposed to have more protein in it than the regular stuff. It tastes just like regular soy sauce, in my opinion. I must say though, The packaging looks like it hasn't been redesigned since the 90s. Just saying.


Here is what the peanut butter and soy sauce looked like mixed together:


Here is the finished rice:


So, I'm not sure if this turned out like it was supposed to because of the whole not clear about the rice amounts thing. I would love it anyone who makes this recipe leaves a comment and tells me how you made it and how it turned out. Did you cook a bunch of rice and then measure out a cup of the cooked rice? Did you measure a cup of dry rice and then cook it? Really. I would love to know your opinions!